Niagara Falls Outfit Ideas for Photos & Comfort
I remember standing near Niagara Falls for the first time, thinking I had nailed my outfit.
Light top. Clean sneakers. Looked great in the mirror.
Five minutes later, I was damp, slightly cold, and wondering why my clothes suddenly felt heavier. The mist wasn’t gentle. It kept coming. The wind pushed it straight into everything I was wearing.
That’s when it hit me. This place doesn’t care how good your outfit looks if it doesn’t work.
And here’s the part most people don’t realize until it’s too late. Niagara Falls changes how your clothes feel, how your photos turn out, and how long you actually enjoy being there.
I learned that the hard way.
So if you’re planning your visit and want photos that look good without feeling uncomfortable five minutes in, there are a few things you need to get right before you even step near the water.
I’ll walk you through what actually works, what fails fast, and the small choices that make a bigger difference than you’d expect.
Because once you get this right, everything about the experience feels easier.
Why Your Outfit Matters More Here Than You Think
Here’s the thing most people don’t realize before they arrive.
You’re not just dressing for a scenic spot. You’re dressing for water in the air, constant movement, and shifting weather.
According to the official Niagara Parks travel information, visitors should expect to get wet near major viewpoints. That’s not a maybe. It’s part of the experience.
I felt it almost instantly. Even when it wasn’t raining, my sleeves picked up moisture. My hair changed texture. The air itself felt heavier than it looked.
Here’s where it gets tricky. You don’t notice it right away in photos, but you feel it within minutes.
That’s why your outfit choice decides two things at once. How long you stay comfortable, and how relaxed you look in your photos.
If your clothes cling, you’ll keep adjusting them. If your shoes slip, you’ll walk differently. And that shows up in every photo, even if you don’t realize it.
So your outfit isn’t just about style. It’s about how quickly you dry, how you move, and how long you can stay present without thinking about what you’re wearing.
Now let’s fix that from the base.
Start With the Base That Actually Works
This is where most people get it wrong.
I used to think “lightweight” meant anything thin. That’s not enough here.
You want fabrics that don’t hold onto water. Because once they do, you feel it for the rest of the day.
One thing I noticed quickly was how bad denim performs here. And I’m not the only one. A guide from Backpacking Bella points out that jeans can stay wet for hours, which makes them uncomfortable fast.
I’ve been there. Slightly damp jeans sound manageable at first. Then an hour passes, and suddenly you feel cold, heavier, and a bit stuck in your own clothes.
Here’s what worked better for me.
Light fabrics that don’t cling when damp. Pieces that dry faster than you expect. And outfits that still hold their shape even after picking up mist.
If you’re packing right now, keep it simple. Skip anything thick, skip anything that absorbs water quickly, and bring at least one outfit you know dries fast.
That one decision can save your entire day.
Once your base works, everything else becomes easier to manage.
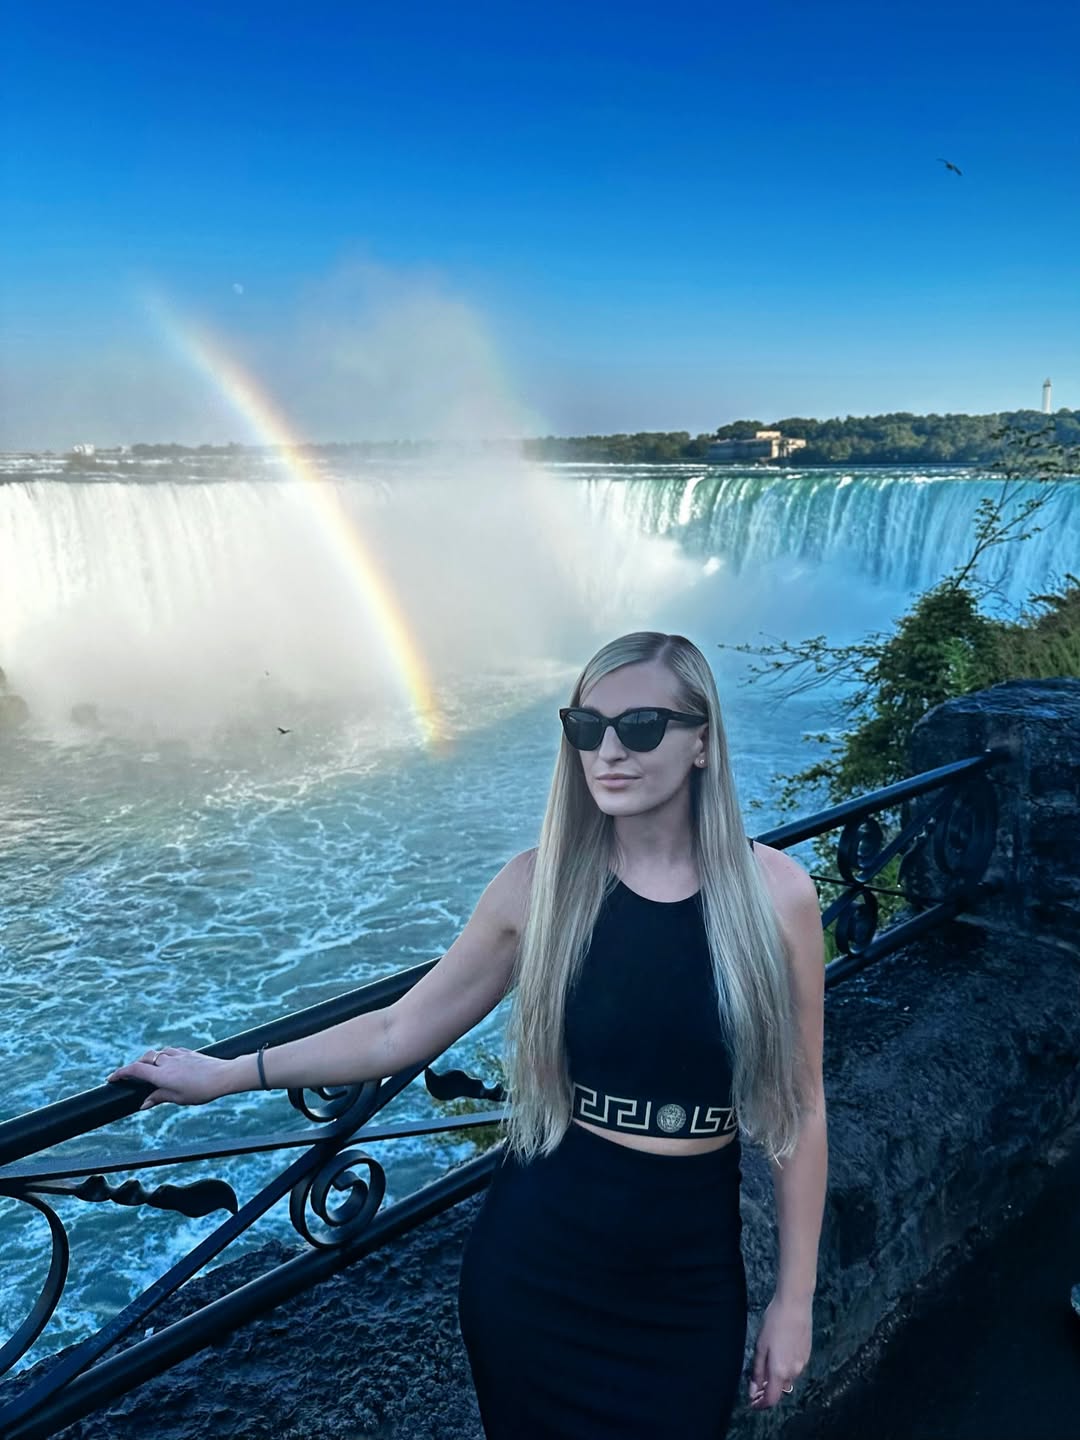
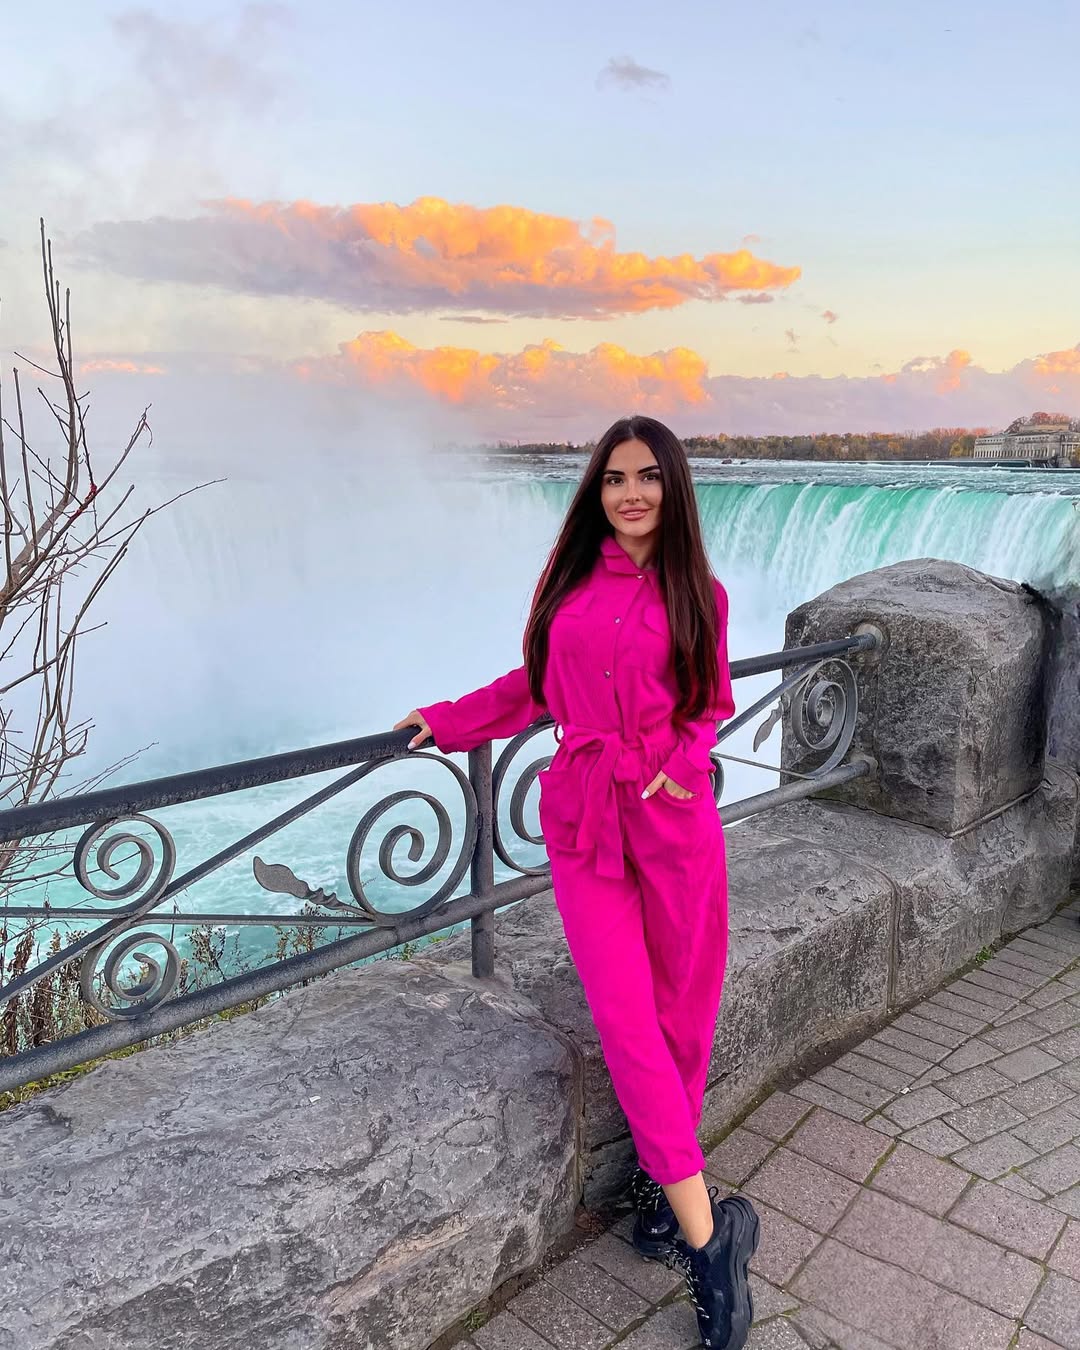
Flowy Looks That Still Work in Real Conditions

I’ll be honest. I wanted that dramatic, flowy outfit shot with the falls in the background.
But there’s a catch.
The wind here doesn’t just gently move your outfit. It can throw it off completely. What looks soft in your room can feel chaotic near the water.
That’s where I had to adjust.
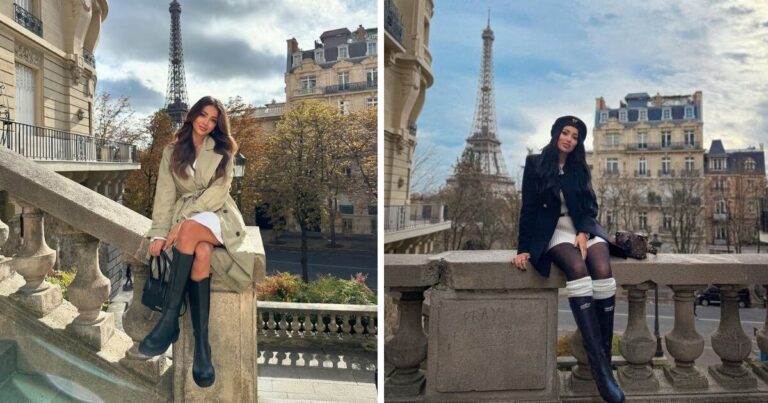
Instead of going fully loose, I started choosing pieces that move but stay controlled. Midi dresses worked better than long maxis. Slightly structured fabric held its shape instead of flying everywhere.
Here’s something I didn’t expect. The mist actually helps your photos. It softens the background and adds depth, which makes even small movement in your outfit stand out more.
So you don’t need extreme flow to get that effect.
If you’re planning your photos, aim for balance. Enough movement to feel natural, but enough structure to stay in control.
And if you’re not in the mood to deal with wind at all, that’s completely fair.
Because some moments aren’t about photos. They’re about staying comfortable and enjoying where you are.
That’s where your next outfit choice comes in.
The Outfit I Ended Up Wearing the Most
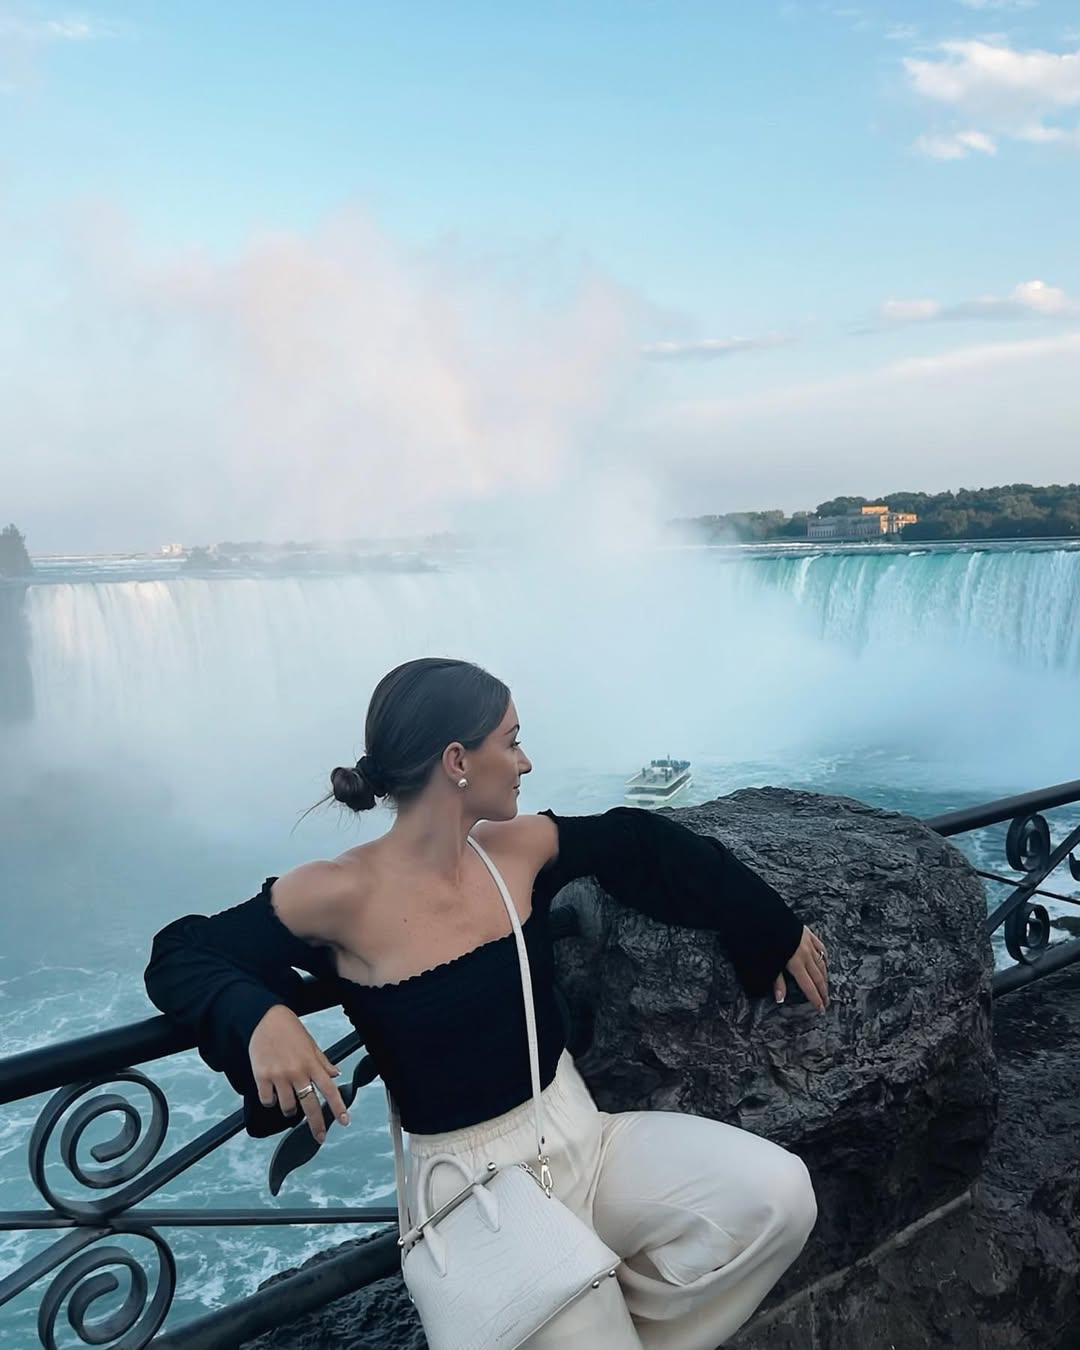
After trying a couple of looks, I kept going back to one setup.
A fitted top, a light outer layer, and comfortable bottoms.
Simple. But it worked every time.
There’s a reason for that. The mix of walking, humidity, and mist creates this strange feeling where you’re not fully wet, but never fully dry either.
You notice it when your sleeves feel slightly cool. When your clothes stop feeling crisp. When you start adjusting things without thinking.
A packing guide from Wanderlust Photos Blog mentions that moisture and movement can leave clothing damp, which is why moisture-wicking fabrics make a difference.
That matched my experience exactly.
So instead of chasing the perfect outfit, I leaned into something that could handle hours outside without becoming uncomfortable.
If you’re deciding what to wear, start here. Build one outfit that you know you can walk in, sit in, and stay in without needing to change.
Then build your photo outfits around that.
Because once you feel comfortable, everything else falls into place. Your posture relaxes. You stop overthinking. And your photos start looking more natural without trying.
That’s the part most people don’t plan for.
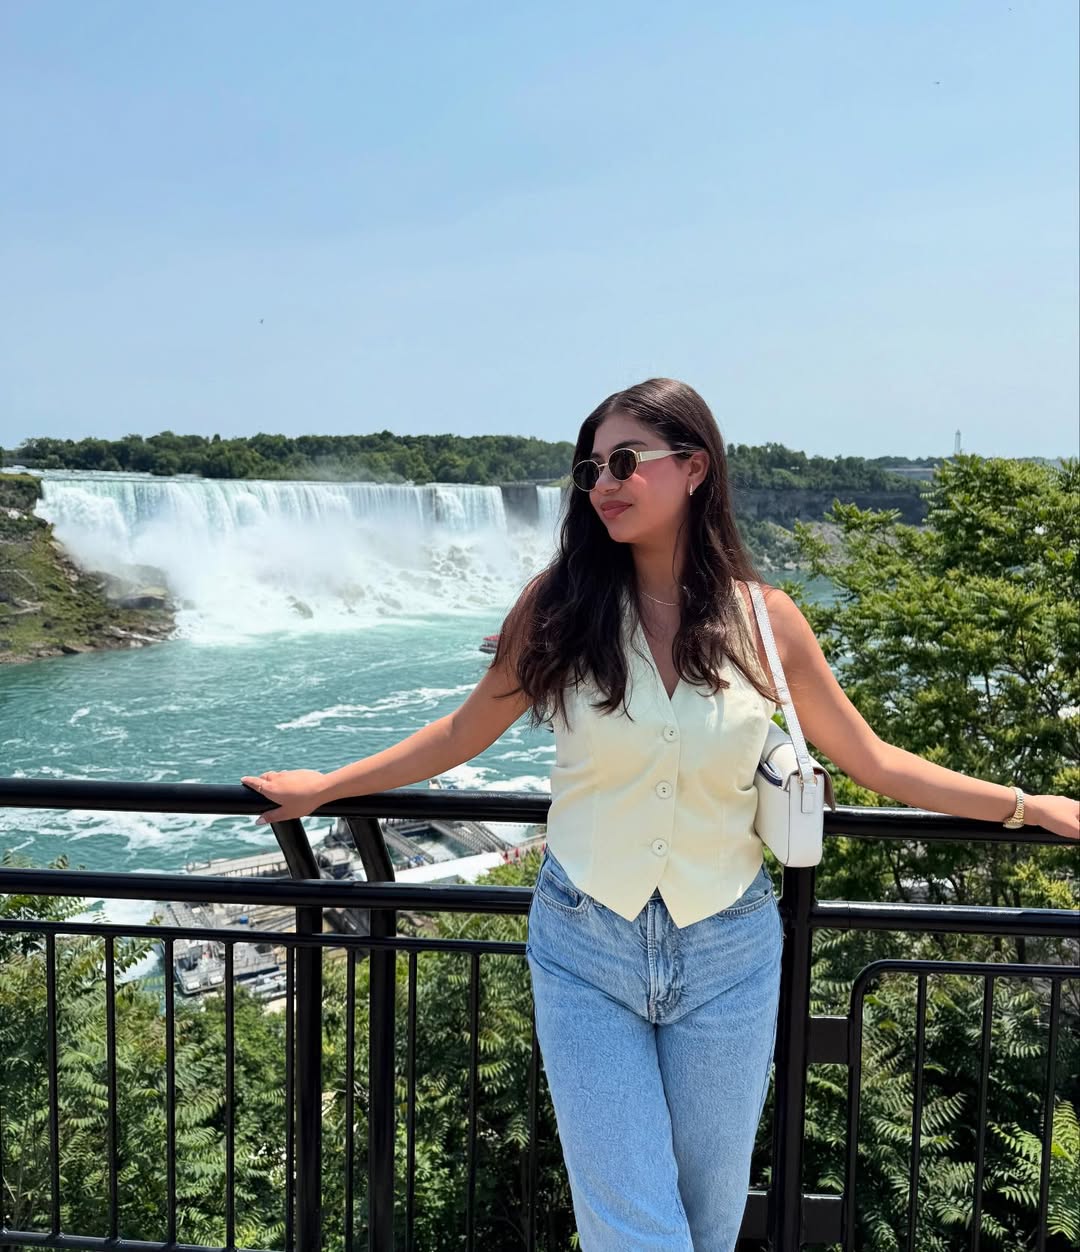
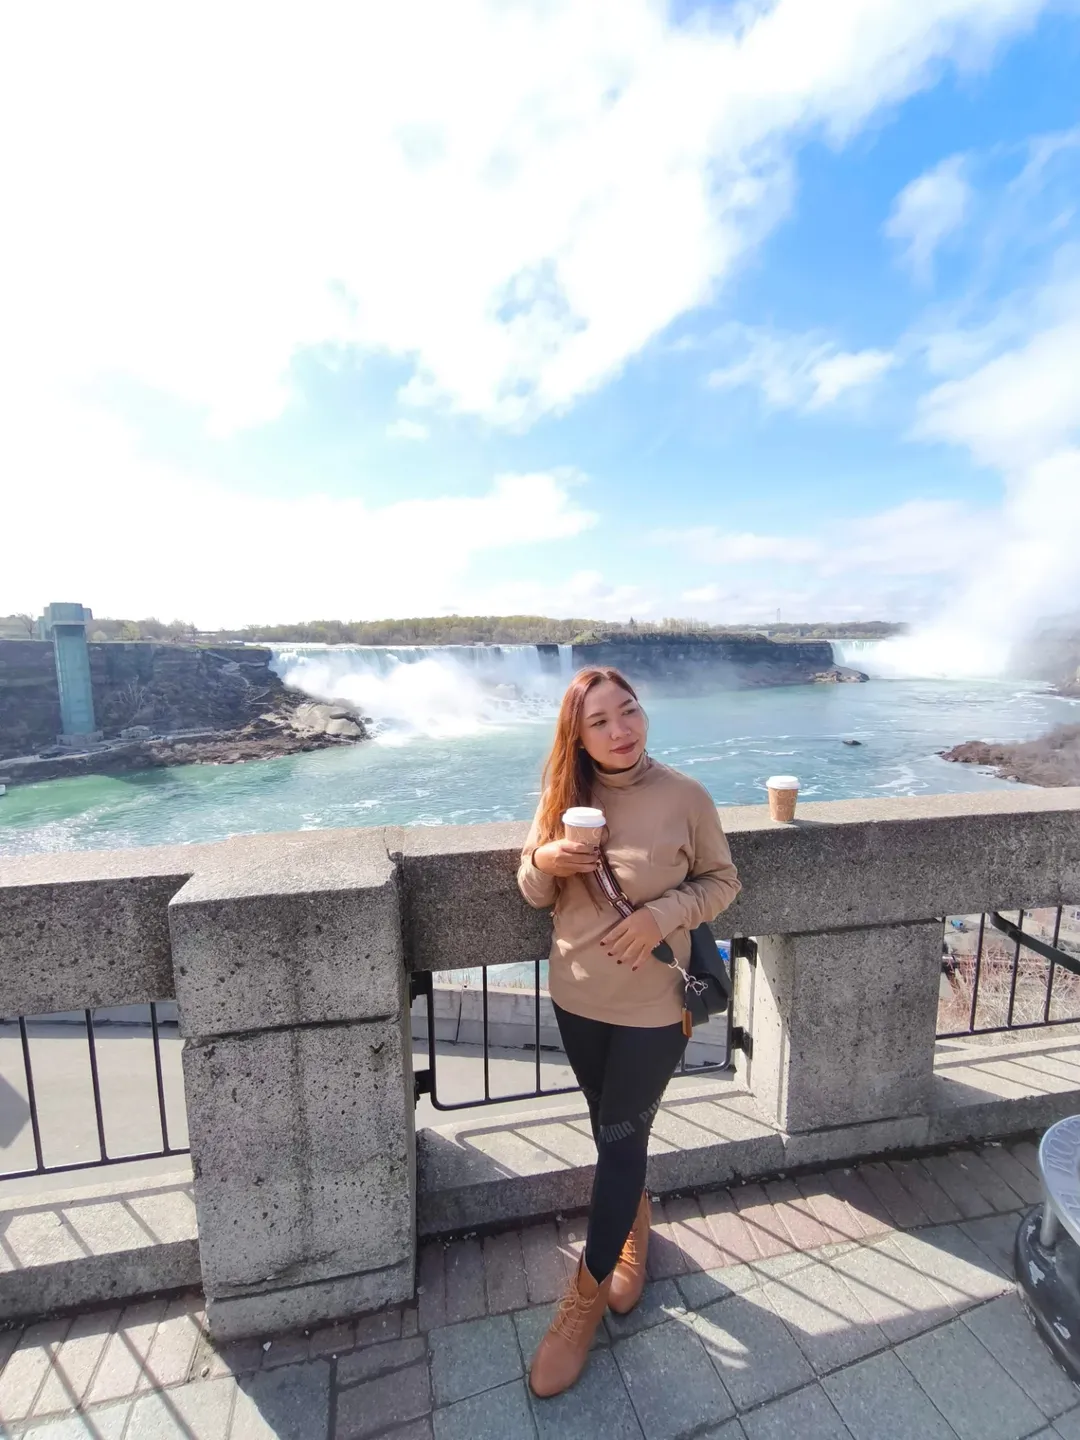
When You Want Clean, Effortless Photos
There’s something I didn’t expect when I looked back at my photos later.
The simplest outfits stood out the most.
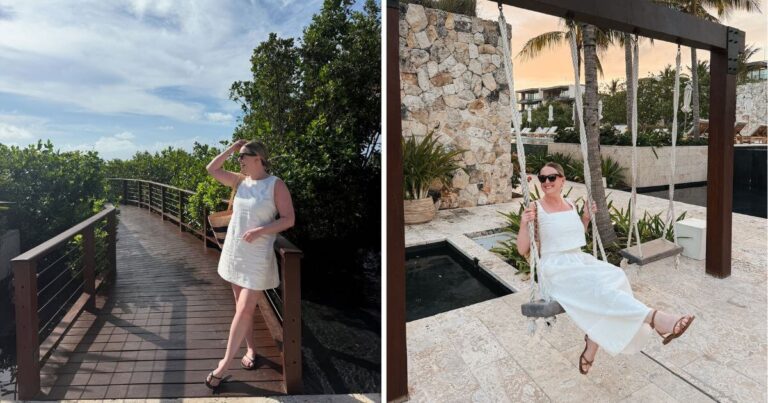
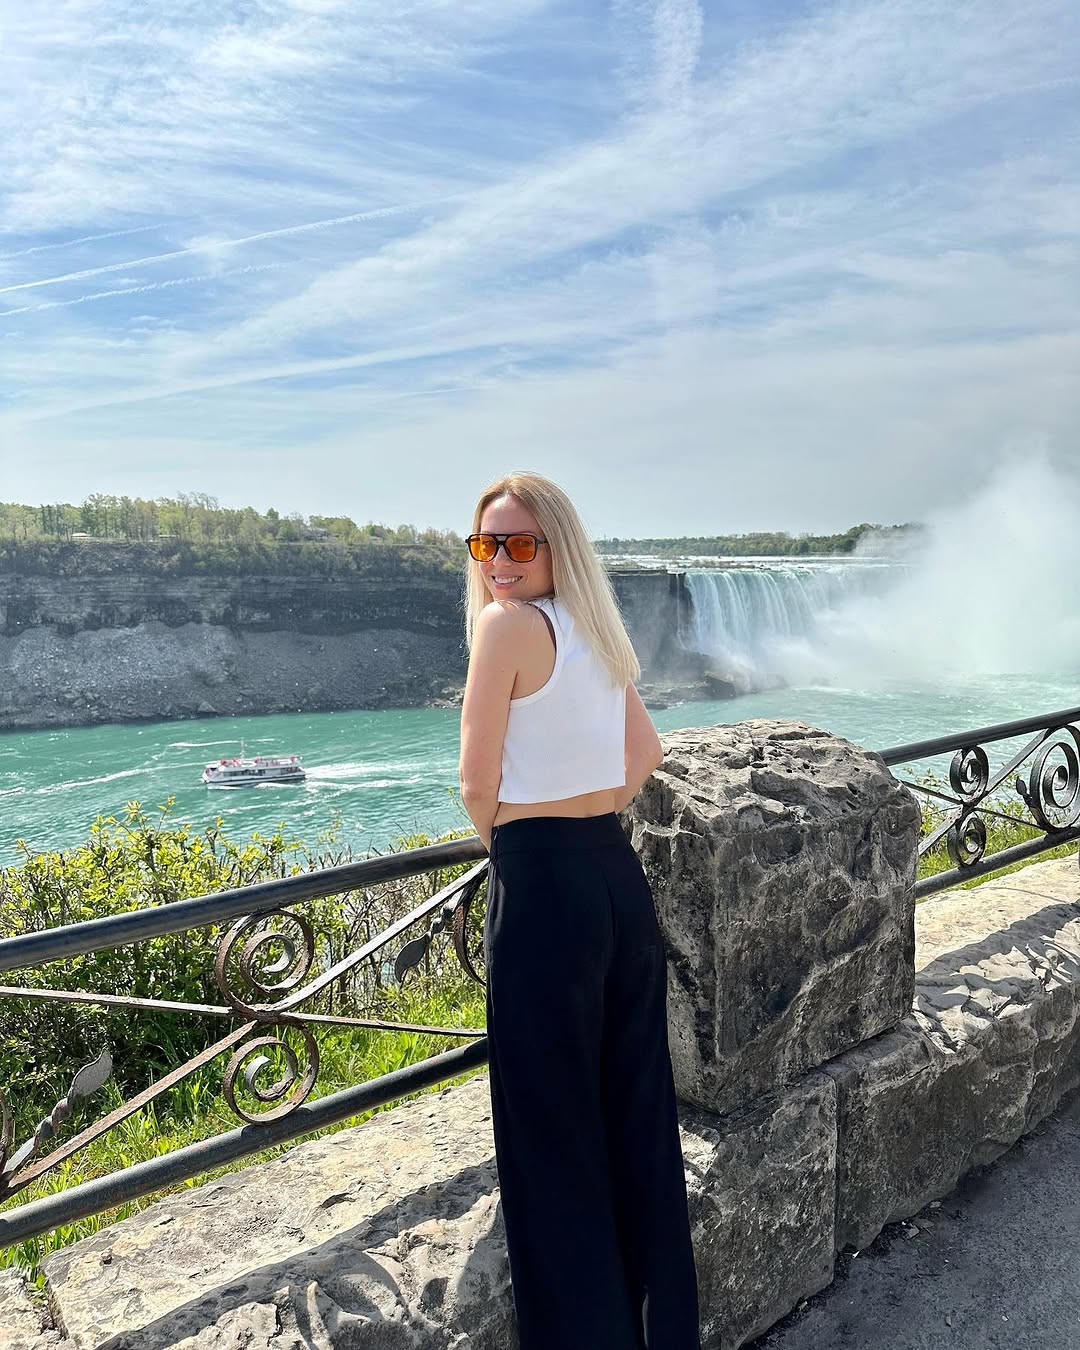
Neutral tones like white, beige, or soft grey worked better than anything else. Against the deep blue and green water, they created a clean contrast without feeling forced.
Nothing competed with the background. Nothing felt too busy.
Here’s what helped.
I kept the outfit simple, then paid attention to small details. Clean lines. No unnecessary layers. Nothing that needed constant adjustment.
If you’re planning your photos, try this. Pick one neutral outfit and wear it during your main viewing time. Let the falls carry the scene.
You’ll notice the difference right away when you compare it to busier looks.
And if minimal isn’t your style, that doesn’t mean you have to give up on strong photos.
You just need to approach it differently.
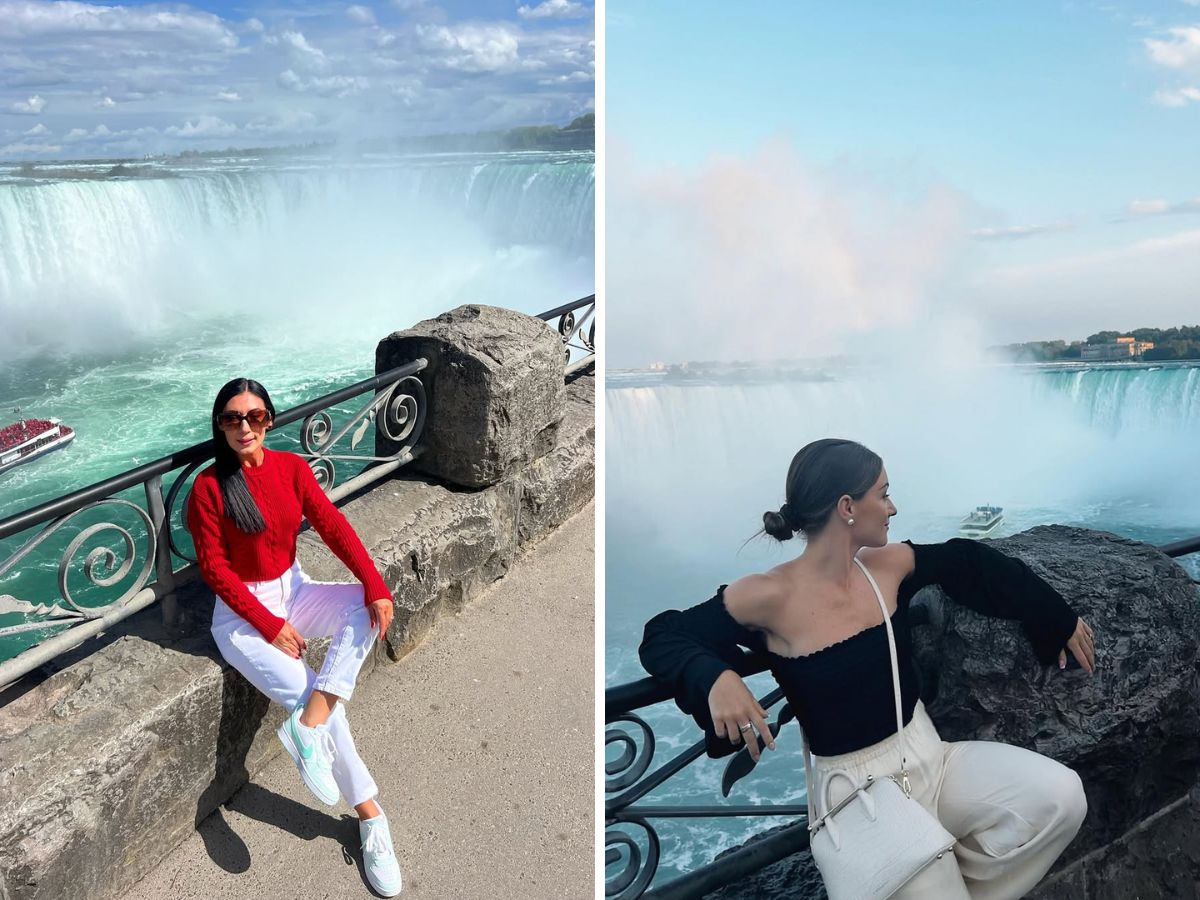
Making Colors Pop Without Overdoing It
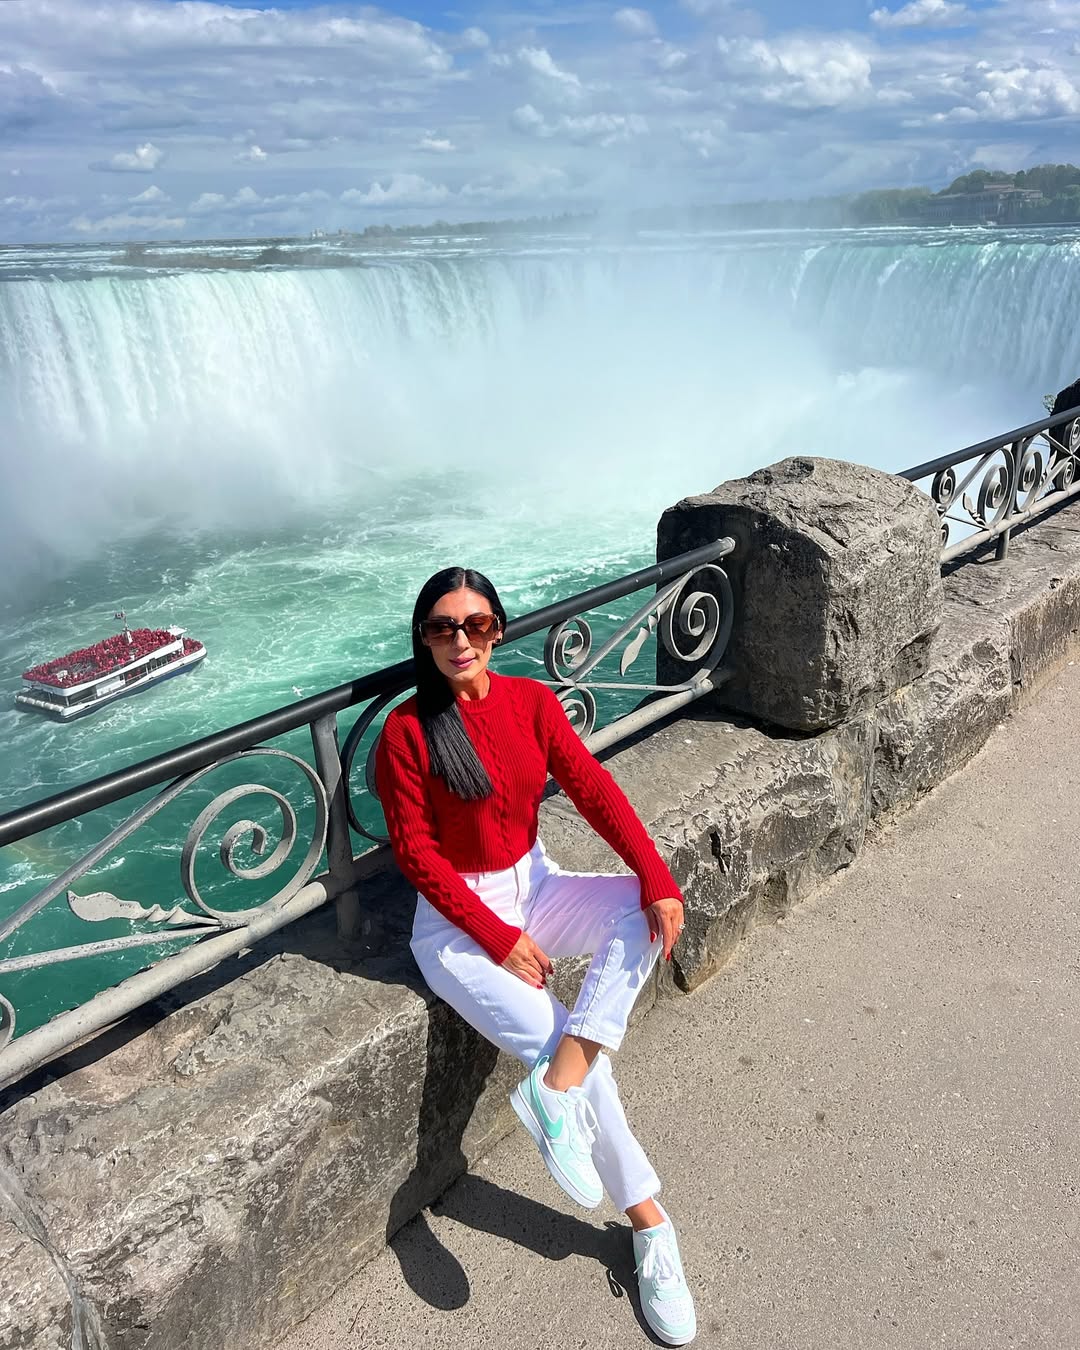
Mist changes how colors behave.
It softens them. Sometimes it makes them look less sharp than they did before you arrived.
That’s why going fully bold doesn’t always work the way you expect.
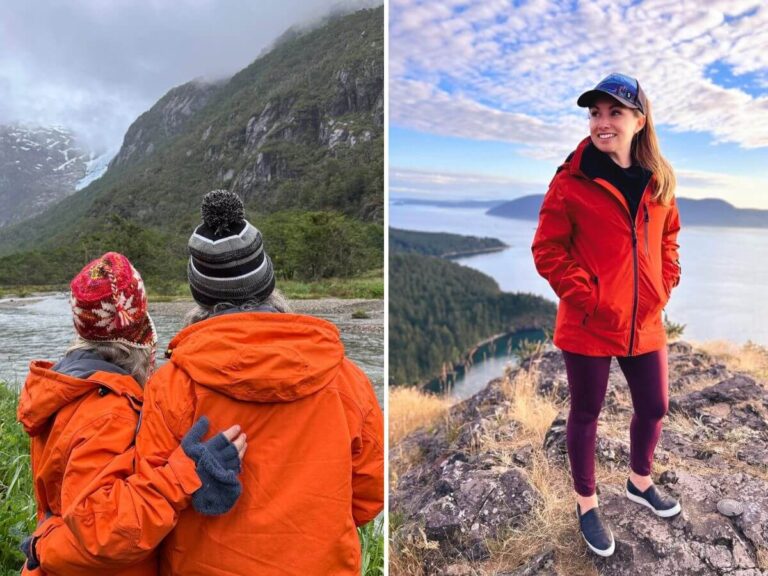
What worked better for me was keeping most of the outfit neutral, then adding one piece that stood out. A red jacket. A bright top. Something that draws attention without taking over the frame.
Here’s a quick way to think about it.
If everything is bold, nothing stands out. But if one piece is bold, your eye goes straight to it.
That becomes the focus of the photo.
If you’re packing, plan one outfit like this on purpose. One strong color, everything else toned down.
It’s a small shift, but it changes how your photos come out.
And once you get this right, there’s one more detail that matters even more than color.
Footwear Can Make or Break Your Day
I underestimated this the first time.
Big mistake.
At first, everything felt fine. Then I stepped onto a slightly wet patch near the railing, and I could feel the difference immediately. Not enough to fall, but enough to change how I walked.
That’s the part you don’t expect. You start walking more carefully without realizing it.
Between the mist and constant foot traffic, surfaces can get slick. A guide from Wear When What Why points out that wet conditions make proper grip footwear important.
That matched what I experienced.
Once I switched to sneakers with a solid grip, everything changed. I walked normally again. I stopped looking down every few steps. I felt more relaxed moving through crowded areas.
If you’re choosing your shoes, think about this. You’ll be walking more than you expect, stopping often, and standing near damp surfaces.
Go with something stable, slightly water-resistant, and comfortable enough for hours. Something you won’t hesitate to step into a wet patch with.
Skip anything that slides easily or feels even a little unstable. It’s not worth it.
Once your footing feels right, the whole experience becomes easier.
And then there’s something else that catches most people off guard.
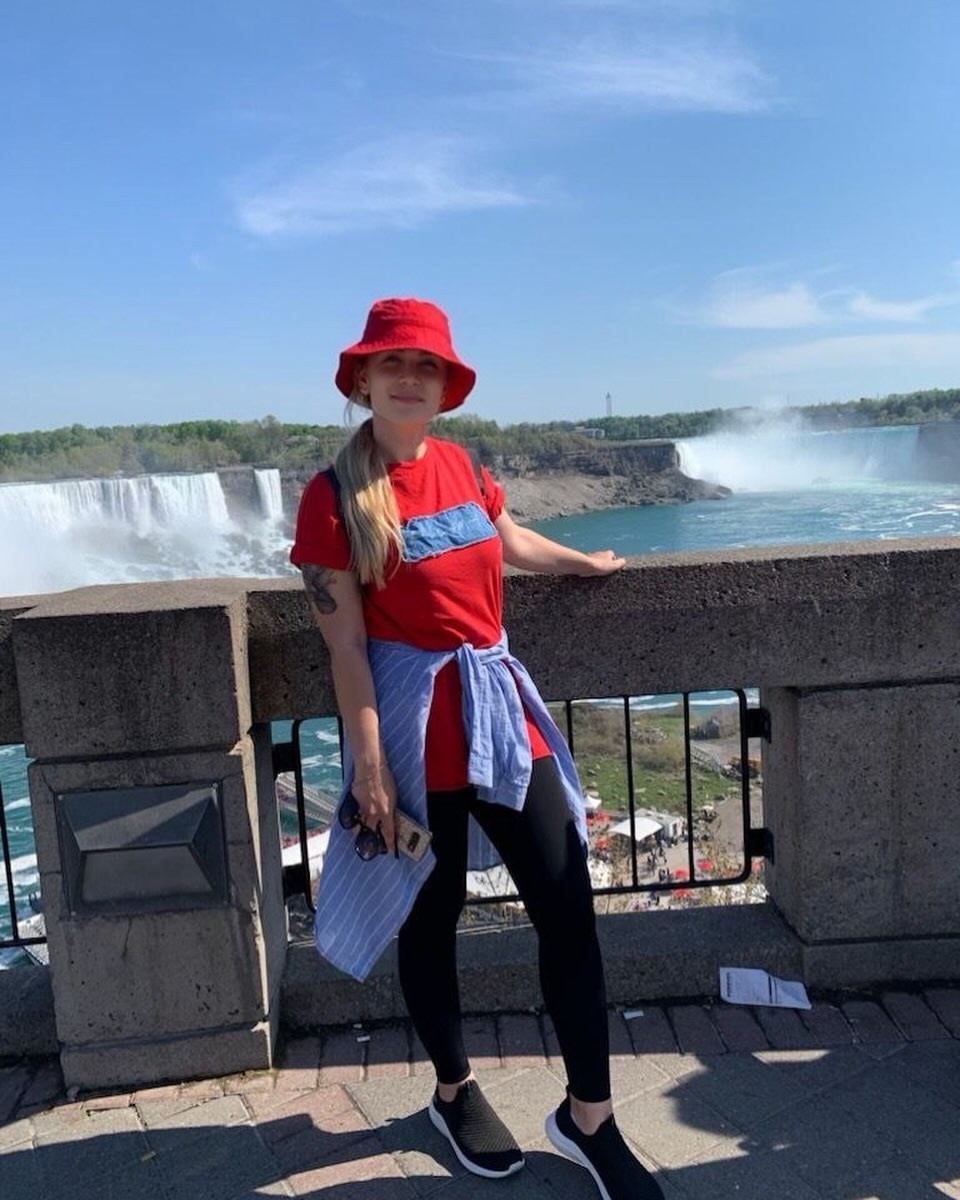
The Layering Trick That Saves You
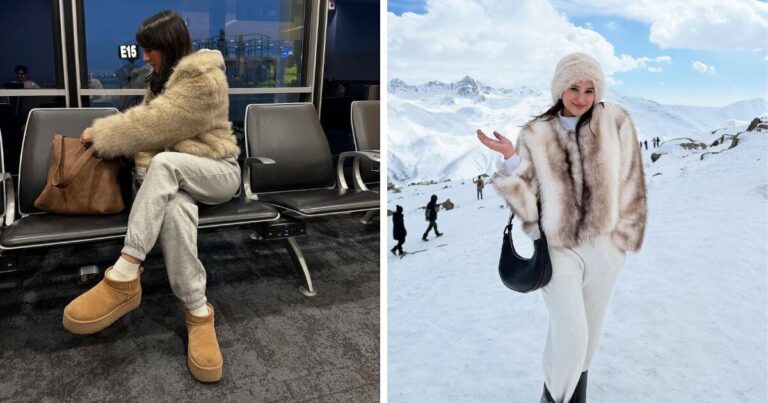
Even on a warm day, it can feel cooler near the falls.
Not because of temperature alone, but because of the constant moisture in the air.
I didn’t expect to reach for a light layer as often as I did. One moment felt fine, the next felt slightly cold, especially when the wind picked up.
That shift happens quickly.
According to See Sight Tours, weather around Niagara Falls can change fast, which is why light layers and waterproof options are recommended.
That advice held up the entire time I was there.
What worked for me was keeping one easy layer within reach. Not something heavy. Just enough to throw on without thinking.
If you’re packing, do this. Bring one lightweight outer layer that you can carry or tie around your waist. Something that won’t feel like a burden when you’re not wearing it.
You might not need it every minute, but when you do, you’ll be glad you have it.
And once you’ve handled comfort, the last part comes down to details people usually ignore.
The Small Things That Quietly Change Everything
This is where most people don’t think ahead.
It’s not the outfit itself. It’s everything around it.
I noticed it with my hair first. The moisture changed how it sat within minutes. Then it was the small things. Adjusting my bag. Fixing accessories. Little distractions that kept pulling me out of the moment.
So I simplified everything.
Hair that could handle humidity without constant fixing. Accessories that stayed in place. A compact bag that didn’t swing around or get in the way.
If you’re getting ready, ask yourself one question. Will I have to adjust this every few minutes?
If the answer is yes, skip it.
Because the less you have to think about your outfit, the more you can focus on where you are. And that shows in your photos more than any styling choice.
That’s the difference most people don’t notice until later.
What Actually Works at the End of the Day
If I had to do it all again, I wouldn’t overthink it.
I’d start with one outfit I know I can wear for hours without feeling uncomfortable. Then I’d build everything else around that.
A base that dries quickly. Layers that adjust without effort. Shoes I trust on wet ground. And one detail that makes the outfit feel like mine.
That’s it.
Because the best outfit here isn’t the one that looks perfect when you’re standing still.
It’s the one that holds up when the mist hits, the wind picks up, and you’re still walking, stopping, and taking it all in.
And here’s what I noticed looking back at my photos.
The moments where I felt comfortable are the ones that looked the most natural.
No adjusting. No stiffness. Just being there.
That’s what you want to aim for.
Also read:
Things to Pack for Vacation: My Go-To List That Actually Works