Healthy Pre-Made Meals for Camping You’ll Actually Look Forward to Eating
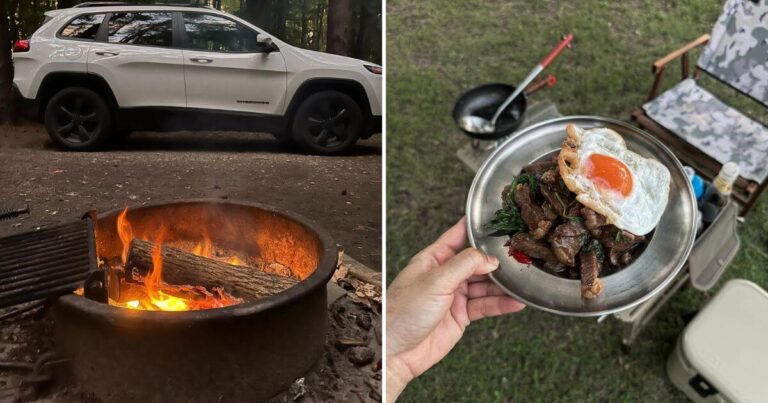
I’ve lost count of how many nights I’ve sat at a campsite, hungry after a long hike, staring at a cold can of beans or another dehydrated “meal.” It’s easy to convince yourself that camp food has to be boring or bland — because who has time to cook in the woods, right?
That changed for me after one trip in the Rockies when I met a couple who unpacked the most delicious-looking wraps and quinoa bowls straight from their cooler. No fire, no mess, just real food ready to eat. It hit me then — camping doesn’t have to mean sacrificing good meals for convenience.
So I started experimenting with pre-made meals that are healthy, simple, and actually taste like something I’d eat at home.
What surprised me most wasn’t how easy it was, but how much better I felt on the trail. Less fatigue, more energy, fewer sugar crashes.
Let’s break down how you can do the same — starting with why prepping ahead changes everything.
Why Pre-Made Meals Work for Real Campers
If you’ve ever ended a long hike too tired to cook, you know that sinking feeling — staring at a pot, knowing you still have to chop, clean, and boil water before you can even eat. Most camping fatigue doesn’t come from the trail. It comes from managing food.
I used to believe camp meals had to be simple and tasteless. Then I started prepping them at home. It changed everything.
When your food’s ready before you even leave, you save time, water, and fuel — and your campsite starts to feel like a break, not a chore.
A National Park Service nutrition brief says that balanced, nutrient-rich meals help campers maintain energy and focus across multi-day trips. In plain terms, a wrap loaded with lean protein and fiber will keep you going longer than any cup of instant noodles.
There’s also the hygiene part no one talks about. The USDA warns that food left above 40°F for more than two hours (or one hour in the heat) can quickly grow bacteria. By prepping ahead, you avoid that entirely — your meals stay sealed, chilled, and safe.
Here’s what you can try right now: make a short list of meals you already love at home. Pick the ones that hold well cold, portion them into containers, and label each with the day you’ll eat it. It’s meal prep with a camp twist — smart, quick, and surprisingly satisfying once you’re out there.
Now that you know why it works, let’s talk about how to keep that food fresh for days without stress.
The Three-Day Freshness Plan
When I first started bringing pre-made food, I realized something simple: some meals keep their flavor, others don’t.
That’s how I came up with my three-day rhythm — it’s easy, safe, and keeps everything tasting like home.
Day 1: eat the fresh stuff — wraps, fruit, and yogurt jars.
Day 2: go for pre-cooked meals like quinoa bowls, lentil salads, and cold pasta.
Day 3: pull out frozen or dense meals that thaw slowly, like burrito bowls or couscous jars.
It’s a small system that makes a big difference.
FoodSafety.gov notes that keeping raw and ready-to-eat foods separated and packing perishables straight from your fridge or freezer helps prevent contamination/
Here’s my routine: before any trip, I freeze my Day 3 meals solid and pack them at the bottom of the cooler. They act like built-in ice blocks for the first two days, then thaw perfectly in time for the last.
If you want to try it yourself, use masking tape to label each container with the day you’ll eat it. That small trick saves you from digging through the cooler in the dark wondering what’s safe to grab.
Once you’ve got your system, it’s time to pack smart so all that food stays cold and clean.
Pack It Right: Containers, Coolers, and Ice Tricks That Work
If you’ve ever opened your cooler to find soggy bread or warm cheese, you know the frustration. I learned the hard way in Arizona — everything went into one big cooler, and by day two my yogurt smelled like smoke and chicken marinade.
Never again.
Now I use two coolers: one for drinks and snacks, and another for food that has to stay cold.
Clemson University’s food safety team says airtight containers and limited air exposure keep meals fresher longer.
Here’s my setup that hasn’t failed yet:
- Bottom layer: frozen meals and ice packs.
- Middle: pre-cooked foods in sealed containers.
- Top: fresh snacks and wraps for easy reach.
Slip a small thermometer inside so that you make sure that the temperature is always below 40 degree F.
Here’s another tip I wish I’d learned sooner: don’t drain the melted ice. Cold water insulates your food better than air. Refill with frozen water bottles instead of loose ice and you’ll have cold drinking water as they melt — less mess, less waste.
If you’re camping with friends, give everyone their own section of the cooler. It keeps things organized and stops the constant lid-opening that kills the chill.
Once your meals are packed tight and cold, you’re ready for the fun part — eating food that actually tastes good outdoors.
Healthy and Simple Meal Ideas That Don’t Need Cooking
Now for the part that makes all this prep worth it. These meals were made to be eaten under the stars — no stove, no mess, no cleanup. I’ve tested each one on real trips, from mountain campsites to coastal drives, and they’ve all survived the cooler test.
Every recipe fits into the three-day plan. Some taste best right after you arrive, others hold their flavor for days. Either way, they’ll make you forget camp food ever meant instant noodles.
Let’s start with the ones I reach for most often.
How to Use This
Think of this as your weekend plan in a cooler. Pick six to nine meals for a three-day trip. Label every container with the meal name and day. Slide ice packs close to proteins and dairy, and keep grains or produce on top where it’s slightly warmer. When you reach camp, all you have to do is open, stir, and eat under the trees.
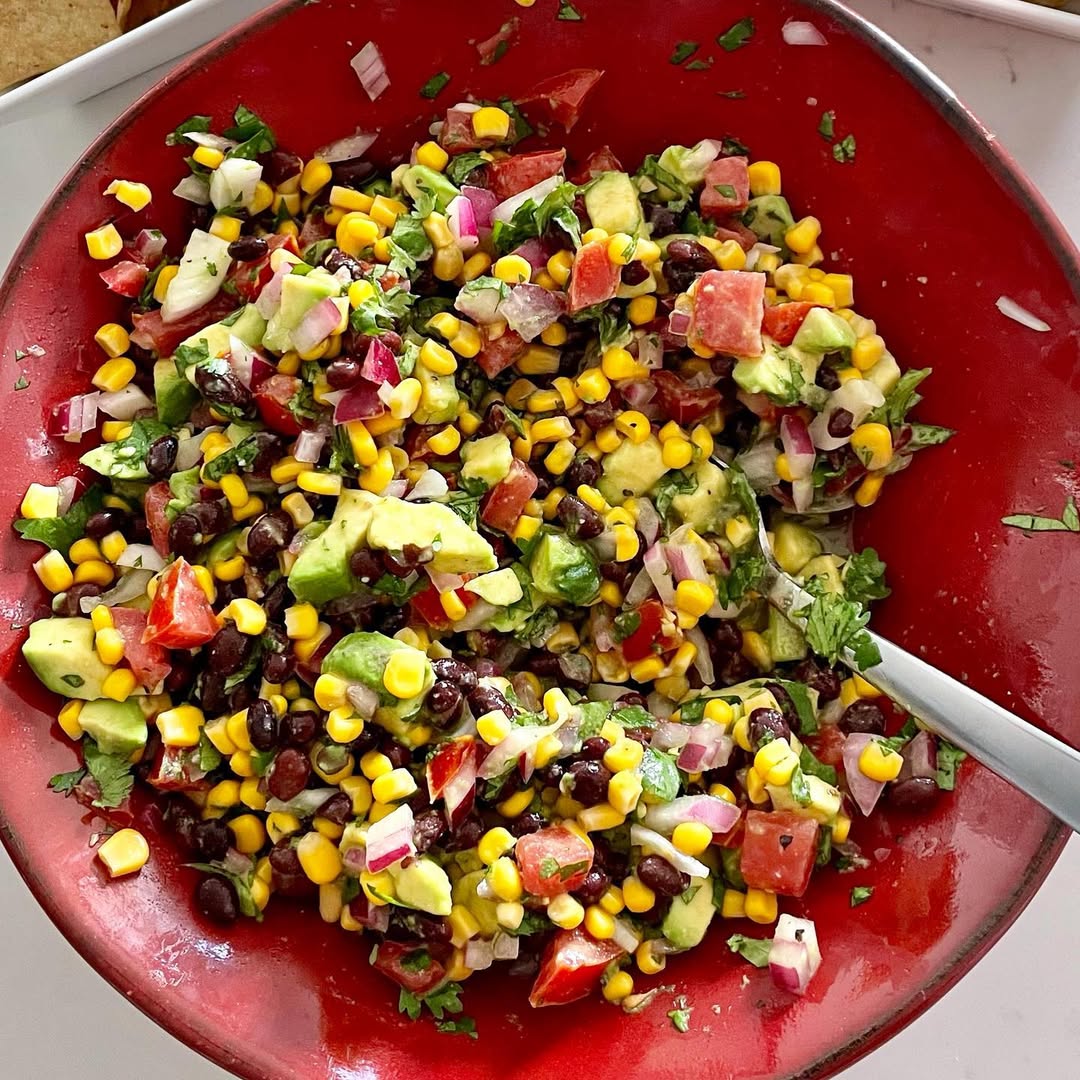
Quinoa Power Bowls
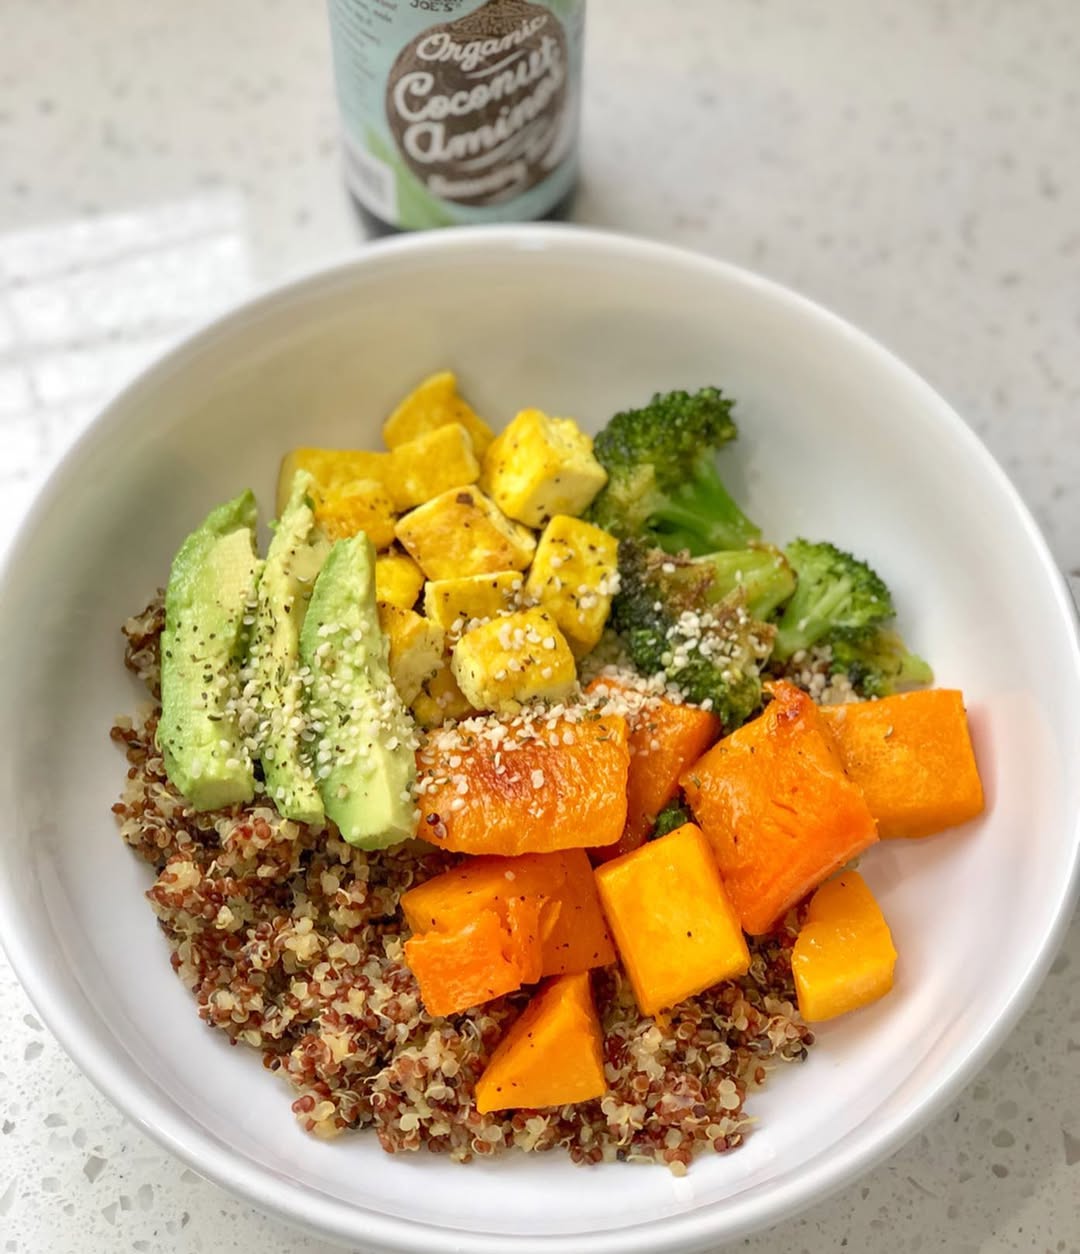
Best for: Day 1 or Day 2
Why I pack it: It holds its texture and tastes bright even when cold.
Ingredients
- 3 cups cooked quinoa, cooled
- 1 can black beans, rinsed
- 1 cup cherry tomatoes, halved
- 1 cup corn (thawed if frozen)
- 1 avocado, sliced and stored separately
- Juice of 1 lime, 2 tablespoons olive oil, salt, pepper, and a pinch of cumin
At home
Toss quinoa, beans, tomatoes, and corn with olive oil, lime, and seasonings. Pack in bowls, then store avocado slices with a little lime juice in a small container.
Pack & store
Keep the avocado near the ice. Add it right before eating.
At camp
Give the bowl a quick stir, squeeze fresh lime, and dig in. The tang and chill feel perfect after a hot hike.
Overnight Oats – Three Ways
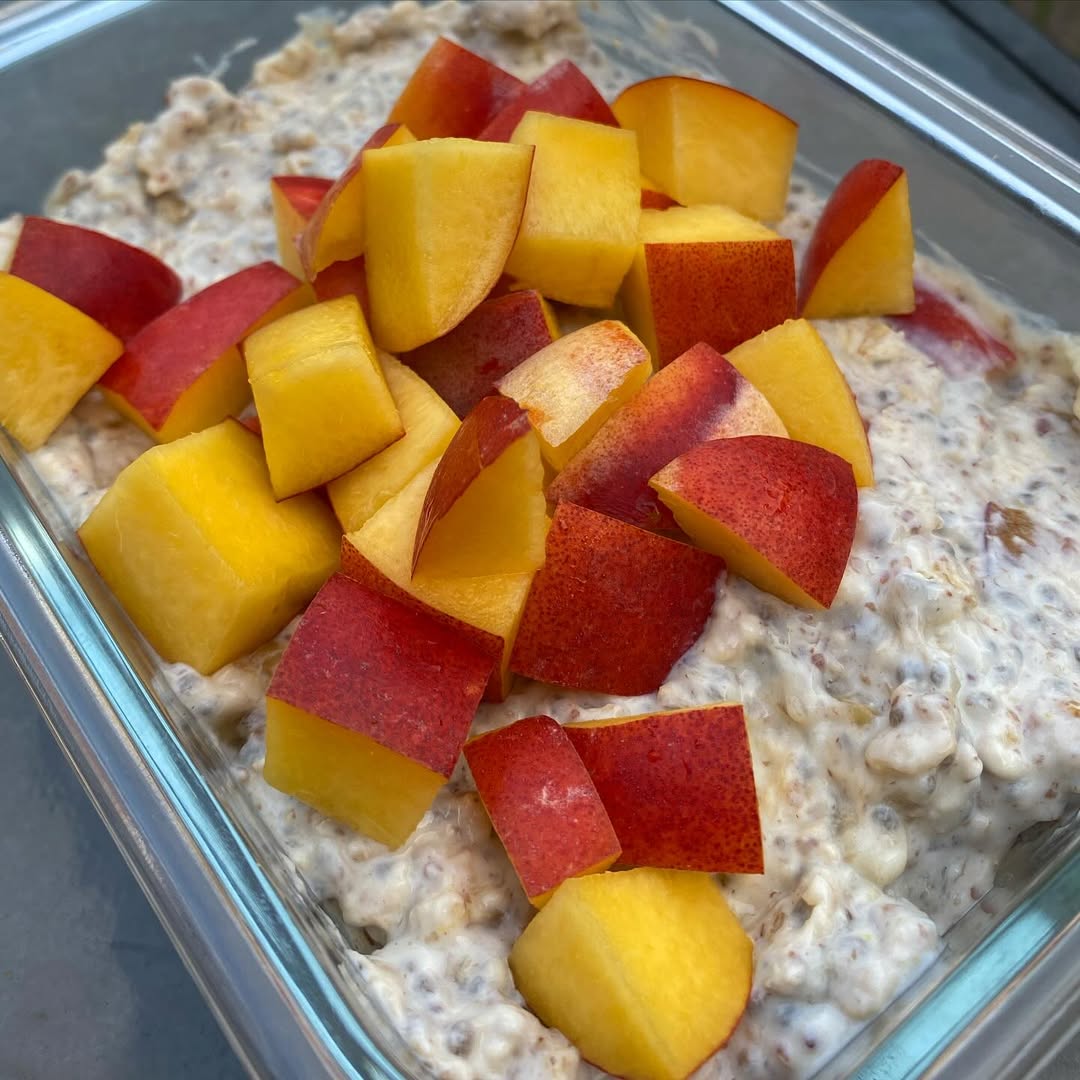
Best for: Day 1 to Day 3
Why I pack it: Breakfast that’s ready the moment I crawl out of the tent.
Ingredients
- 1 cup rolled oats per jar
- 1 cup milk or nondairy milk
- 1 tablespoon chia seeds
- Choose one flavor: Blueberries + vanilla + almond or Peanut butter + banana or Apple + cinnamon
At home
Add everything to jars, seal, and chill overnight.
Pack & store
Keep jars beside the ice. Give each one a shake once a day.
At camp
Eat cold or with a splash of extra milk. It’s creamy, filling, and takes zero effort.
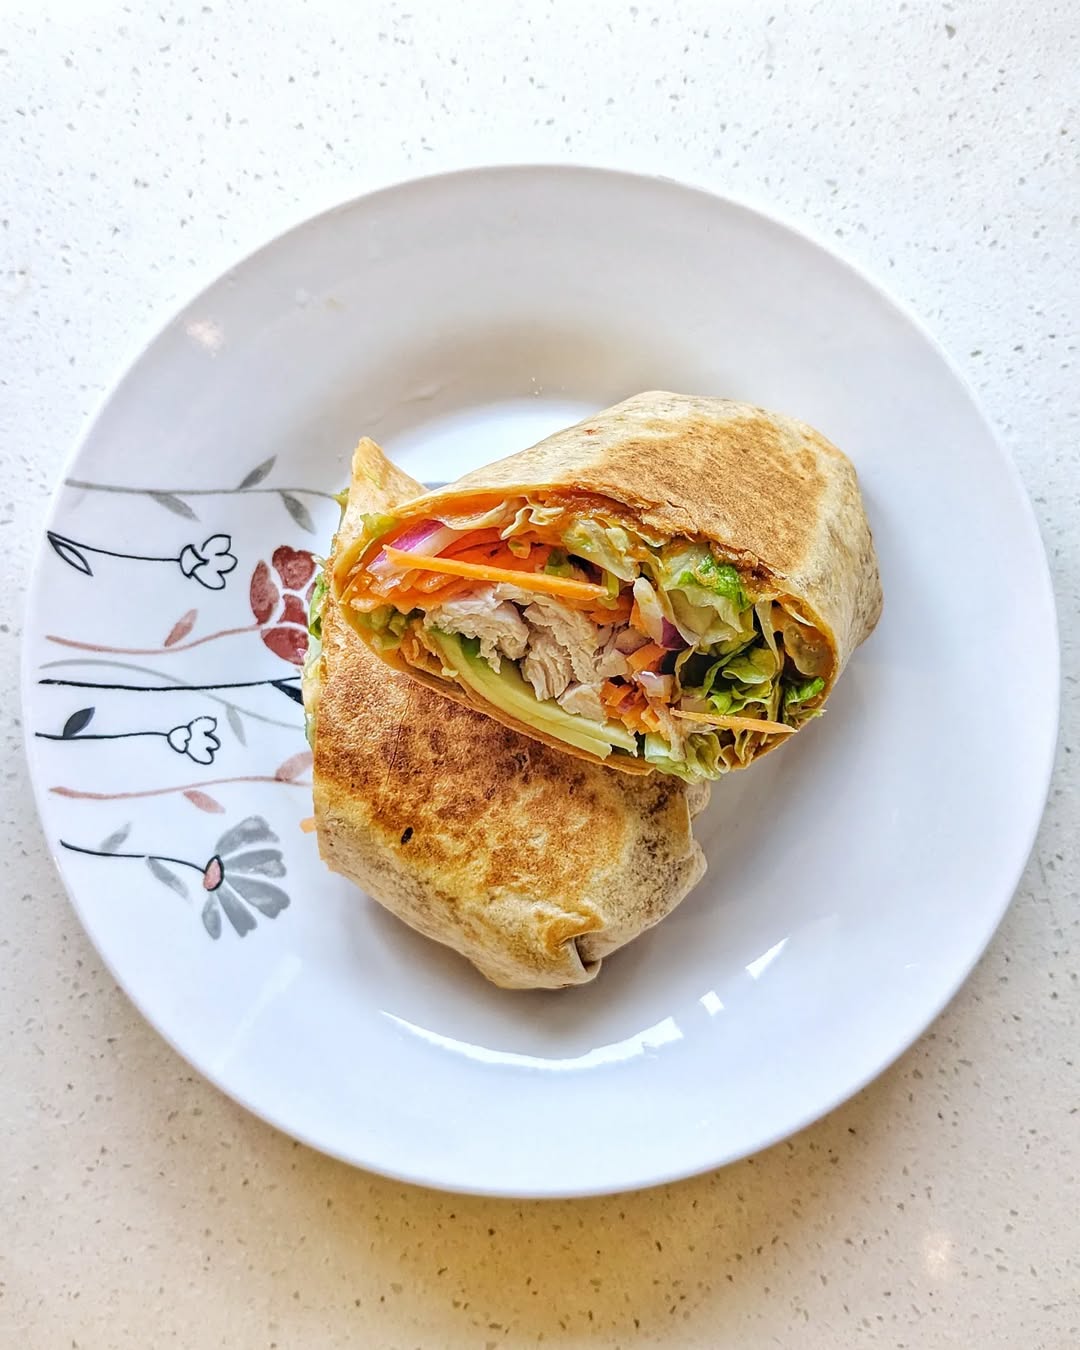
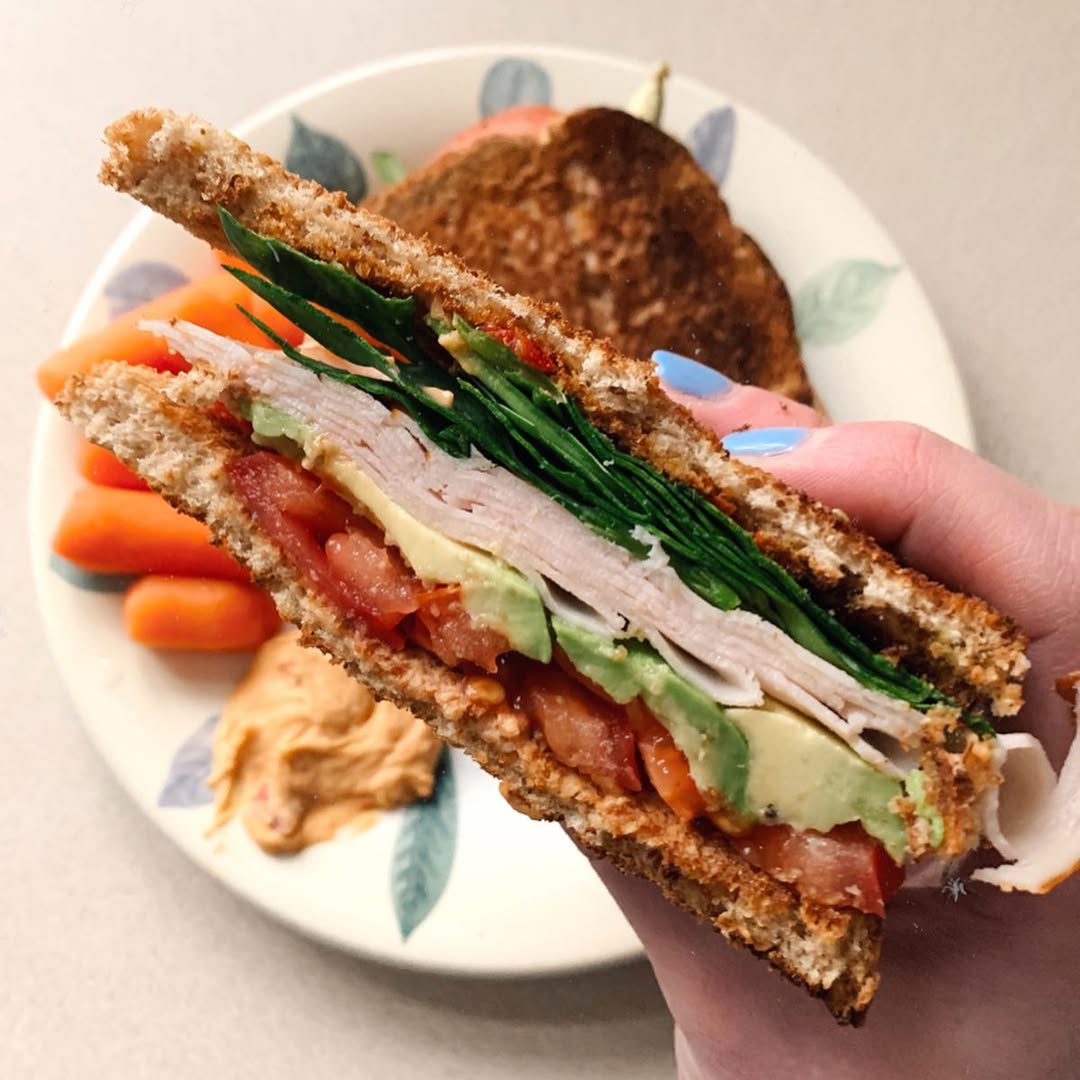
Chicken and Veggie Wraps
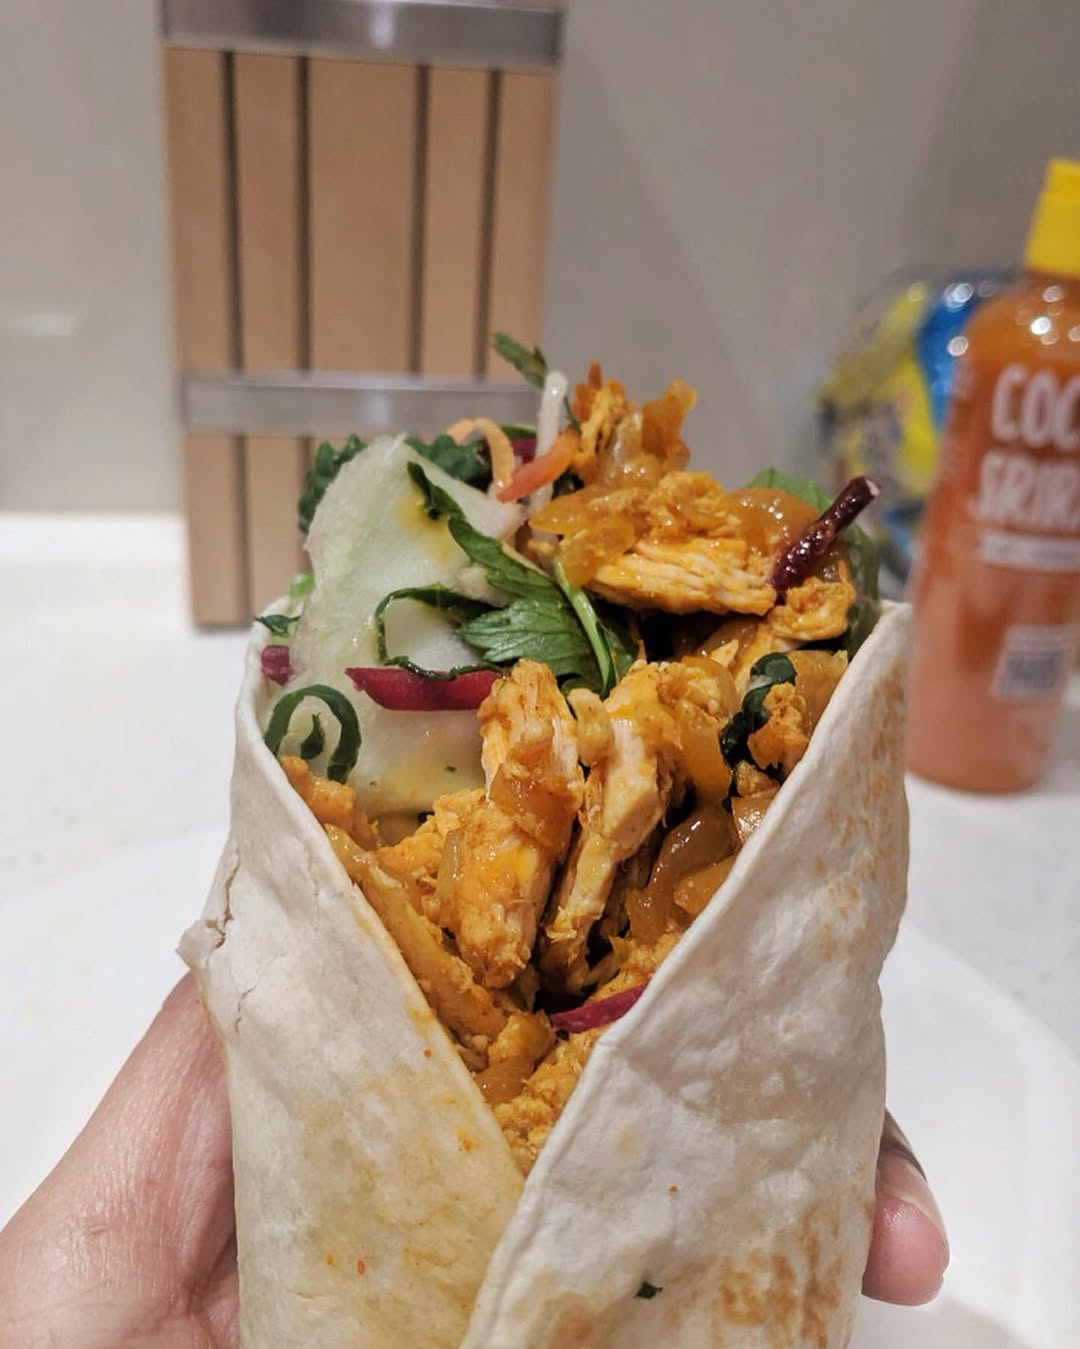
Best for: Day 1 or Day 2
Why I pack it: High protein, no dishes.
Ingredients
- 4 whole-wheat tortillas
- 2 cups sliced cooked chicken breast
- 1 cup shredded carrots
- 2 cups spinach
- 1 cup hummus
At home
Spread hummus, layer chicken, carrots, and spinach. Roll tight, wrap in parchment, then foil.
Pack & store
Set wraps seam-side down against the ice.
At camp
Slice in half and eat cold. They hold together even after a bumpy drive.
Greek Yogurt Parfait Jars
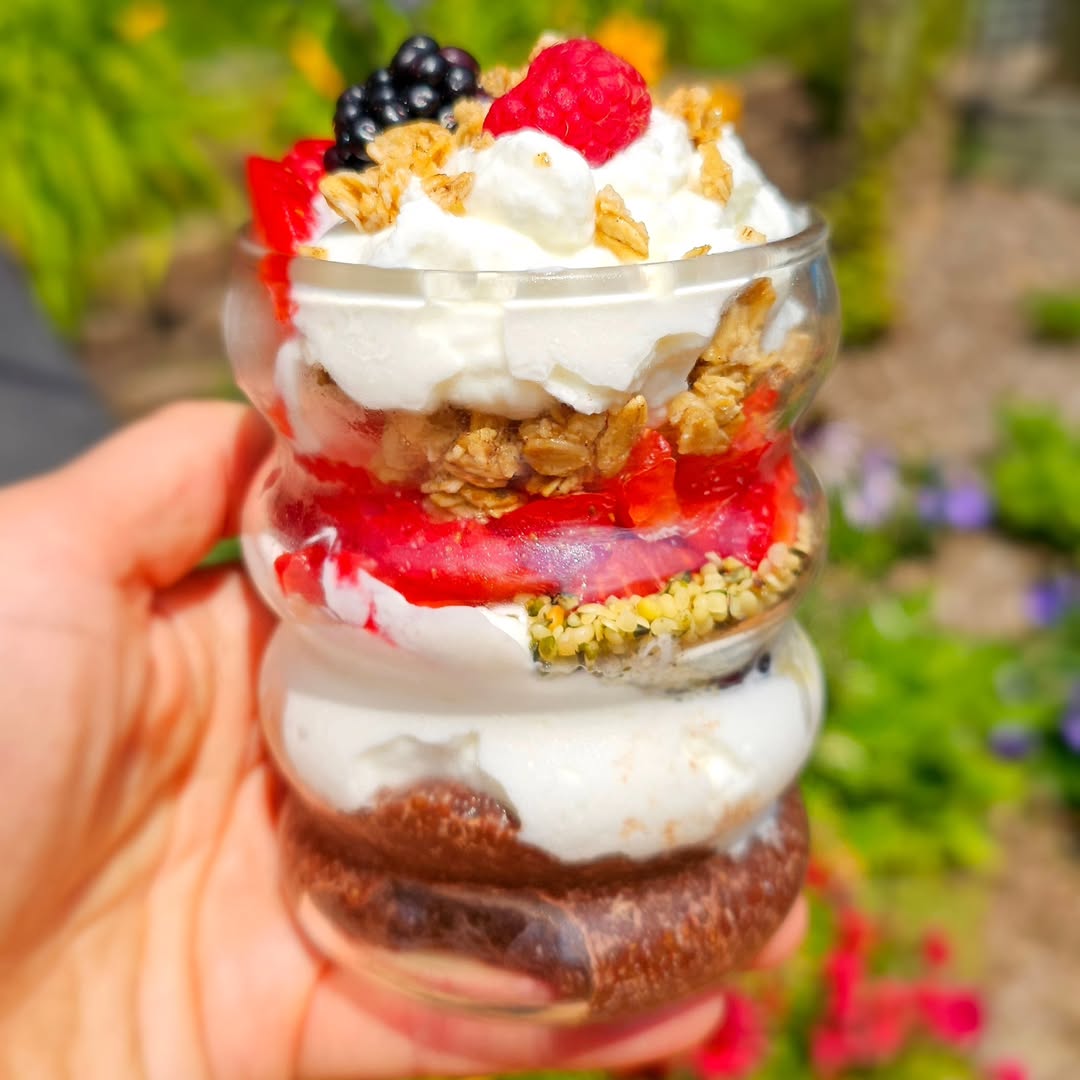
Best for: Day 1
Why I pack it: Quick protein bump with a sweet finish.
Ingredients
- 1 cup Greek yogurt per jar
- 1 cup mixed berries
- ¼ cup granola (packed separately)
- Drizzle of honey
At home
Layer yogurt and berries. Keep granola in a small bag.
Pack & store
Keep jars cold, granola dry.
At camp
Top with granola and honey. It’s cold, crunchy, and tastes like dessert for breakfast.
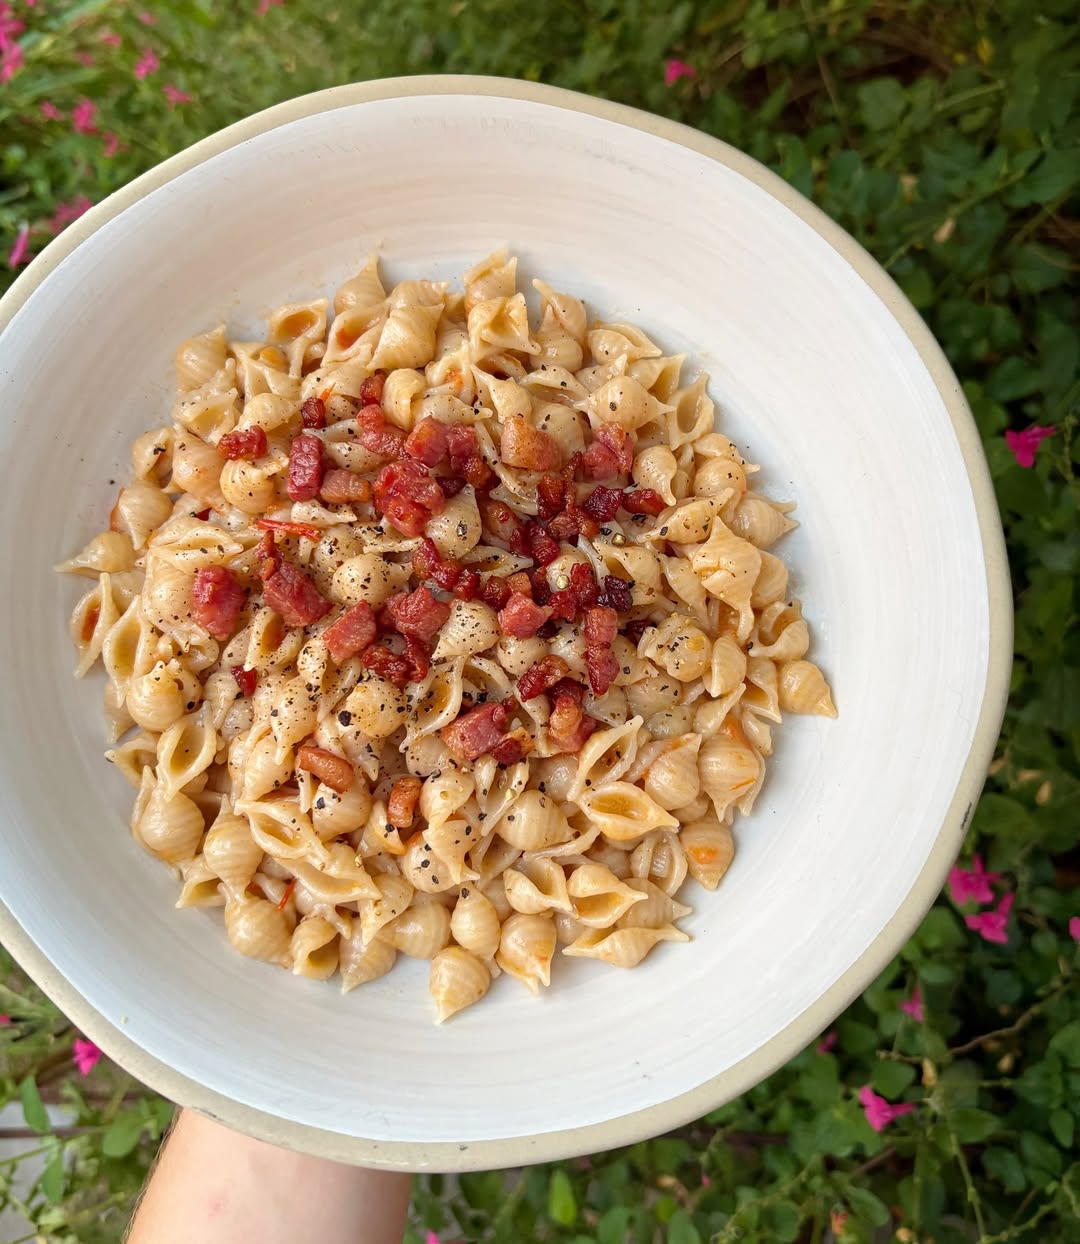
Cold Herb Pasta Salad
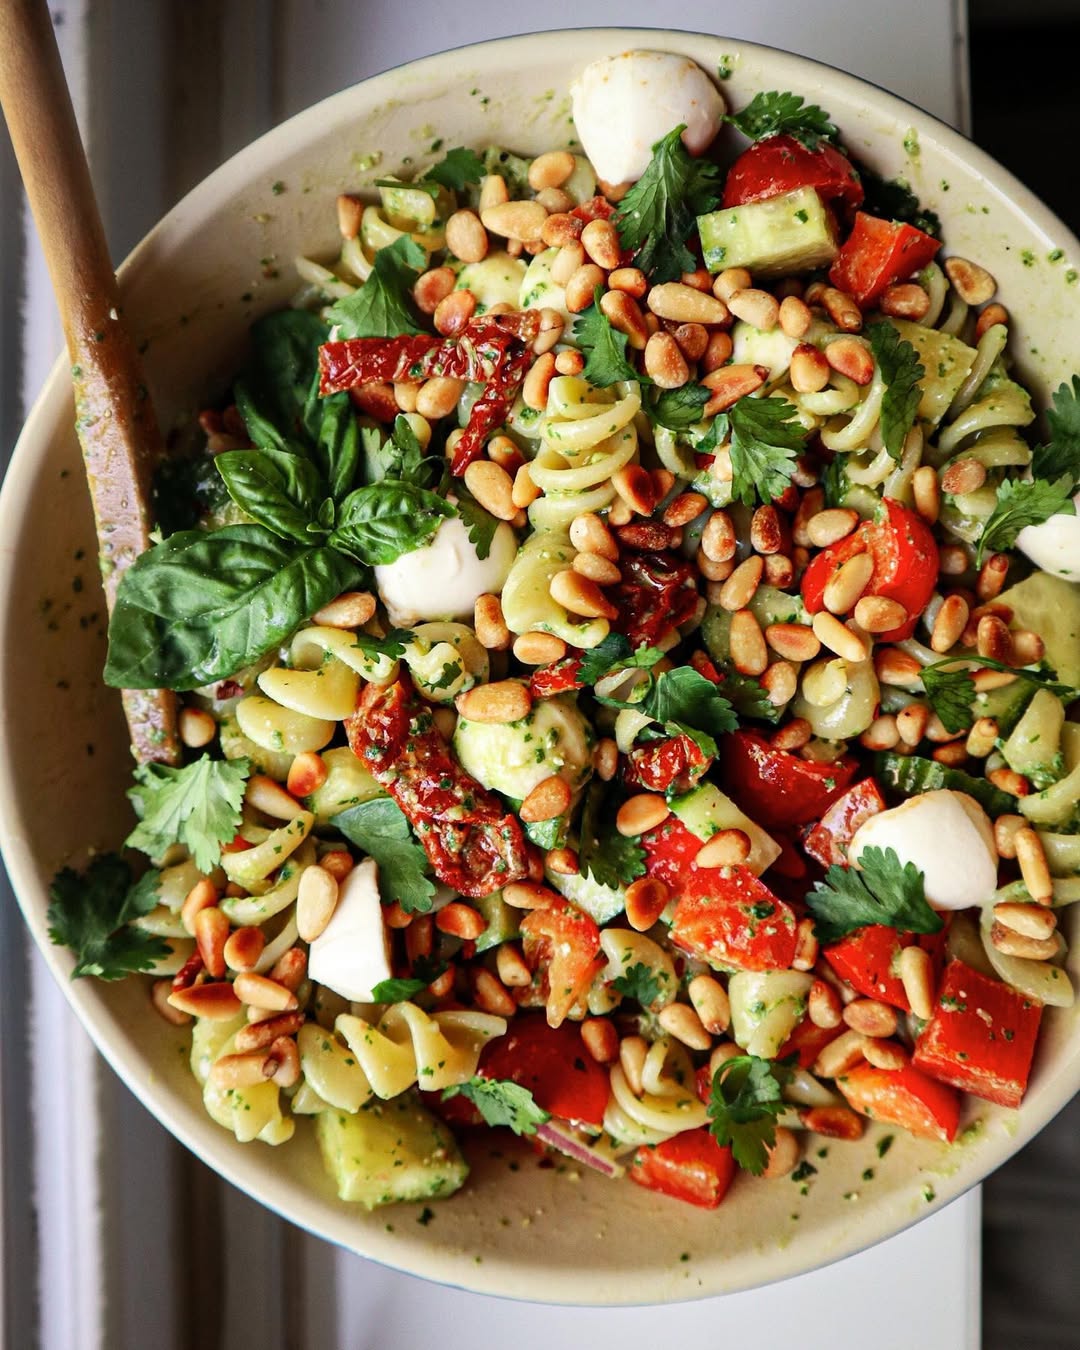
Best for: Day 2
Why I pack it: It’s pure fuel before a long hike.
Ingredients
- 4 cups cooked short pasta, cooled
- 2 cups diced cucumber and bell pepper
- ½ cup sliced olives
- ½ cup crumbled feta
- 3 tablespoons olive oil, 2 tablespoons lemon juice, oregano, salt, pepper
At home
Toss pasta, veggies, and olives with oil, lemon, and spices. Fold in feta.
Pack & store
Lay flat in a shallow container for even cooling.
At camp
Stir and taste for salt or lemon. The flavor gets better by the hour.
Tuna and White Bean Salad
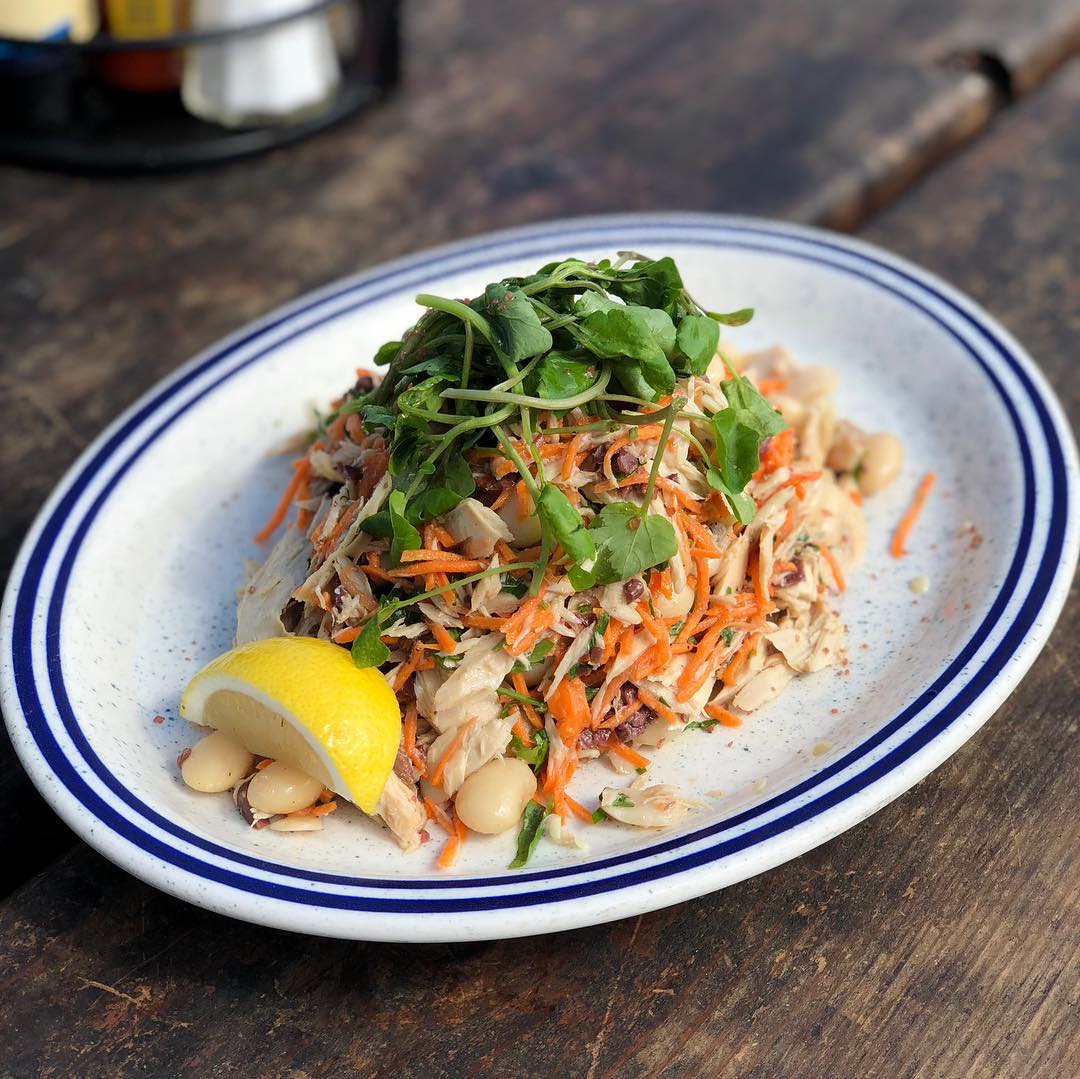
Best for: Day 1 or Day 2
Why I pack it: No bread, no sogginess, all protein.
Ingredients
- 2 cans tuna, drained
- 1 can cannellini beans, rinsed
- ¼ cup minced red onion
- ¼ cup chopped parsley
- 2 tablespoons olive oil
- 1 tablespoon lemon juice, salt, pepper
At home
Mix everything, coat lightly with oil to seal in moisture.
Pack & store
Keep in a tight container near ice.
At camp
Eat over greens or scoop with crackers. It’s clean and refreshing.
Hummus and Crunch Veggie Pitas
Best for: Day 1
Why I pack it: They stay crisp if you assemble smart.
Ingredients
- 4 whole pitas
- 1 cup hummus
- Sliced cucumber, bell pepper, lettuce
- Lemon wedge
At home
Pack hummus and veggies separately. Wrap pitas in a towel inside a zip bag.
Pack & store
Keep hummus cold.
At camp
Spread, fill, and add a quick squeeze of lemon. Fresh, easy, and bright.
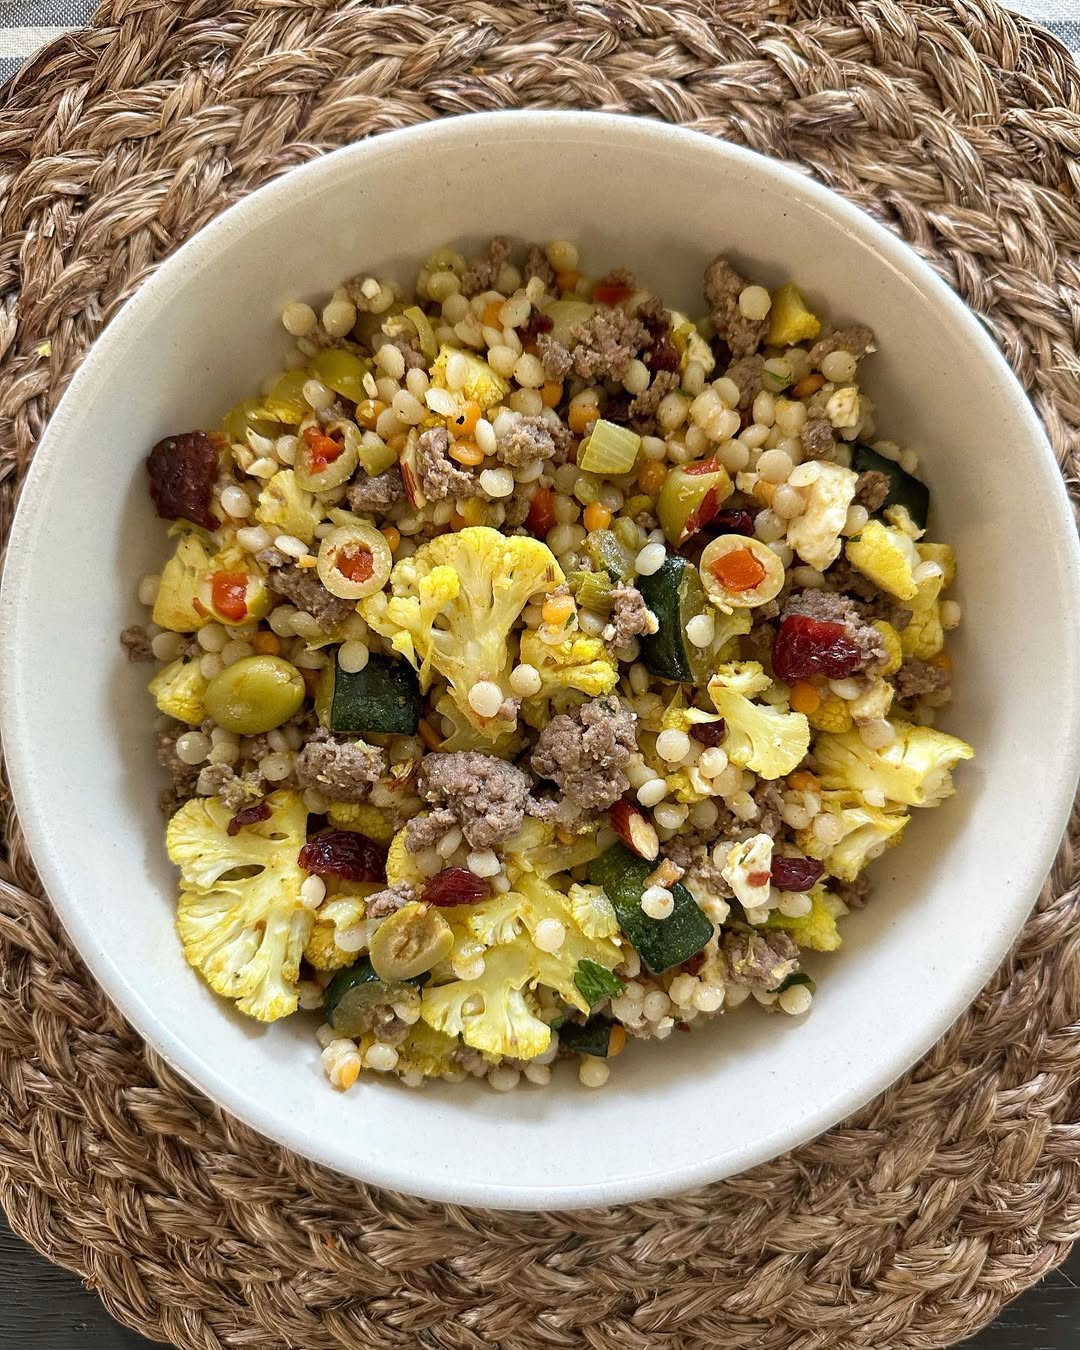
Lentil and Herb Tabbouleh
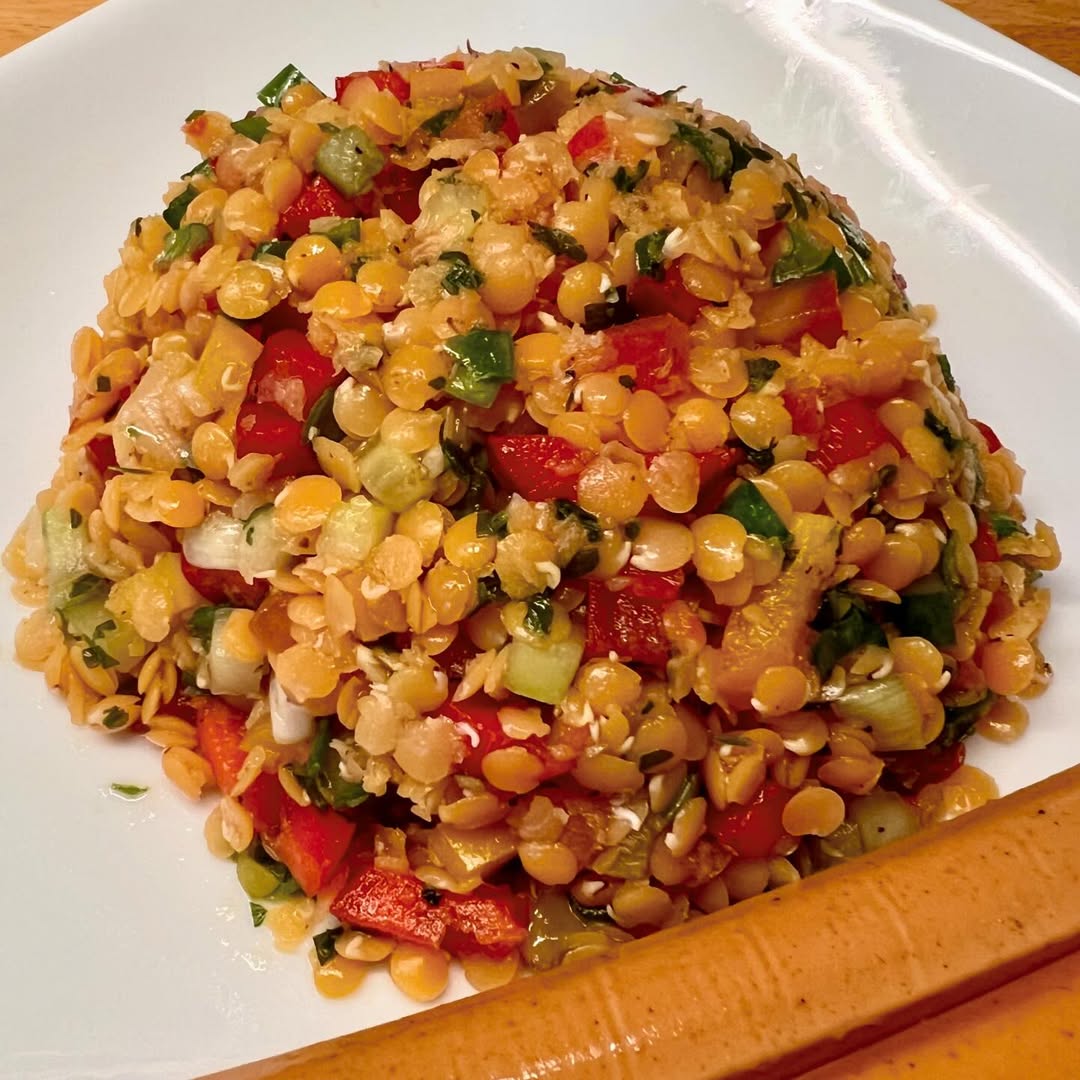
Best for: Day 2
Why I pack it: It’s filling, light, and packed with fiber.
Ingredients
- 3 cups cooked green or brown lentils, cooled
- 1 cup chopped parsley and mint
- 1 cup diced tomato
- 3 tablespoons olive oil, 2 tablespoons lemon juice, salt, pepper
At home
Combine lentils, herbs, and tomato. Add oil and lemon, then chill.
Pack & store
Keep near ice packs.
At camp
Serve cold with pita chips or spoon into wraps.
Turkey Avocado Lettuce Cups
Best for: Day 1
Why I pack it: Fast, clean, and full of flavor.
Ingredients
- 12 butter-lettuce leaves
- 12 ounces sliced deli turkey
- 1 avocado, sliced and stored separately
- Mustard or light mayo
At home
Wash and dry lettuce. Pack turkey and condiments in small bags.
Pack & store
Keep avocado with a squeeze of lime to stop browning.
At camp
Layer turkey and avocado inside lettuce, top with mustard. Eat with your hands — no mess.
Black Bean and Corn Salsa Jars
Best for: Day 2 or Day 3
Why I pack it: Works as a dip or a quick bowl topper.
Ingredients
- 1 can black beans, rinsed
- 1 cup corn
- 1 cup diced tomatoes
- ¼ cup red onion
- ¼ cup cilantro
- 2 tablespoons lime juice, salt, chili powder
At home
Mix all ingredients, portion into jars.
Pack & store
Keep chilled. The flavor deepens by Day 2.
At camp
Serve with chips or spoon over rice. It tastes even better with sunlight and cold soda.
Smoked Salmon Bagel Boxes
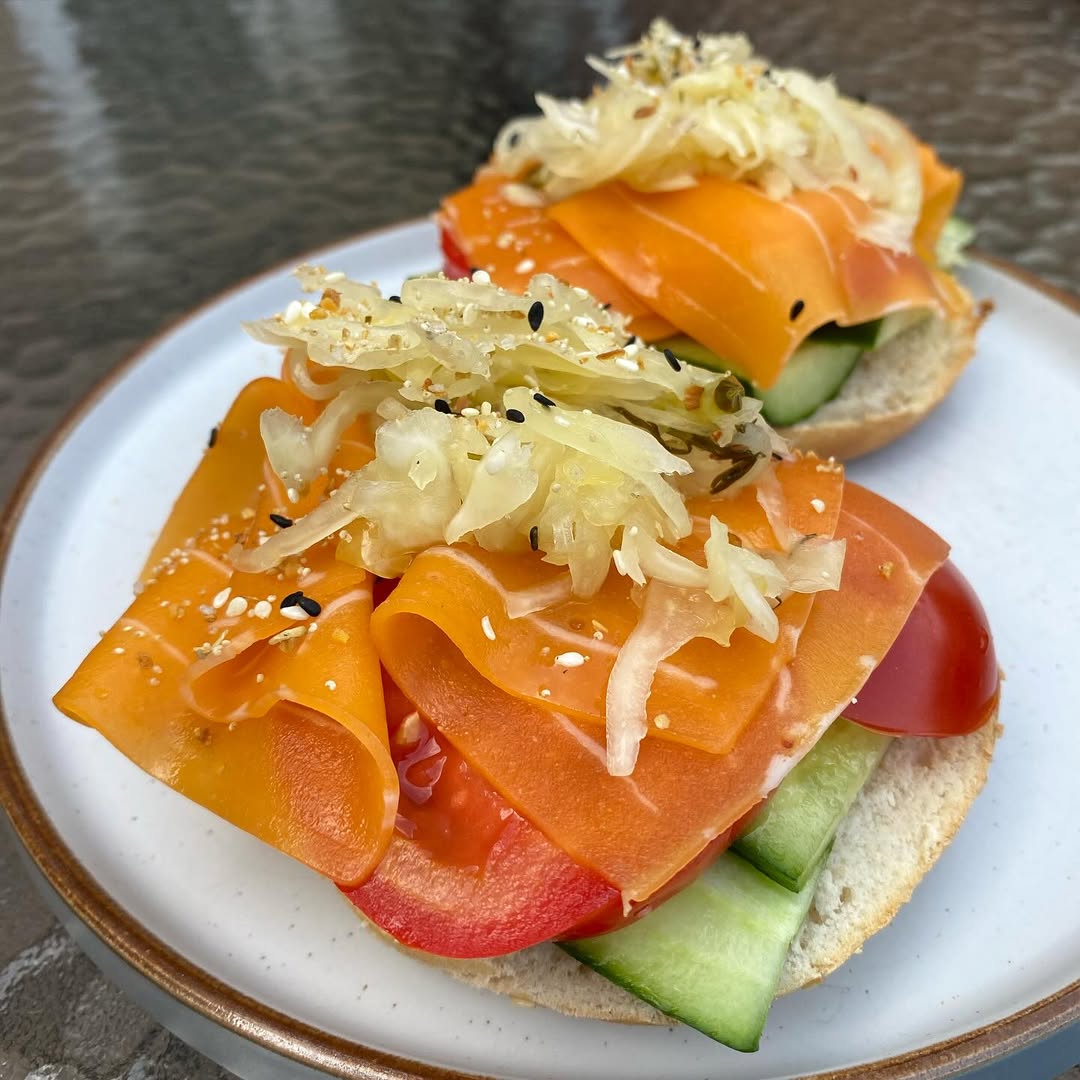
Best for: Day 1
Why I pack it: A no-cook treat that feels fancy out in nature.
Ingredients
- 2 whole-grain bagels, halved
- 6 ounces smoked salmon
- ½ cup cream cheese
- Cucumber ribbons, capers, red onion
At home
Pack each item in a divided container. Keep salmon and cream cheese on the cold side.
Pack & store
Ice packs above and below.
At camp
Build your bagel and take a moment — this one feels like brunch in the woods.
Caprese Salad Jars with Whole Grain
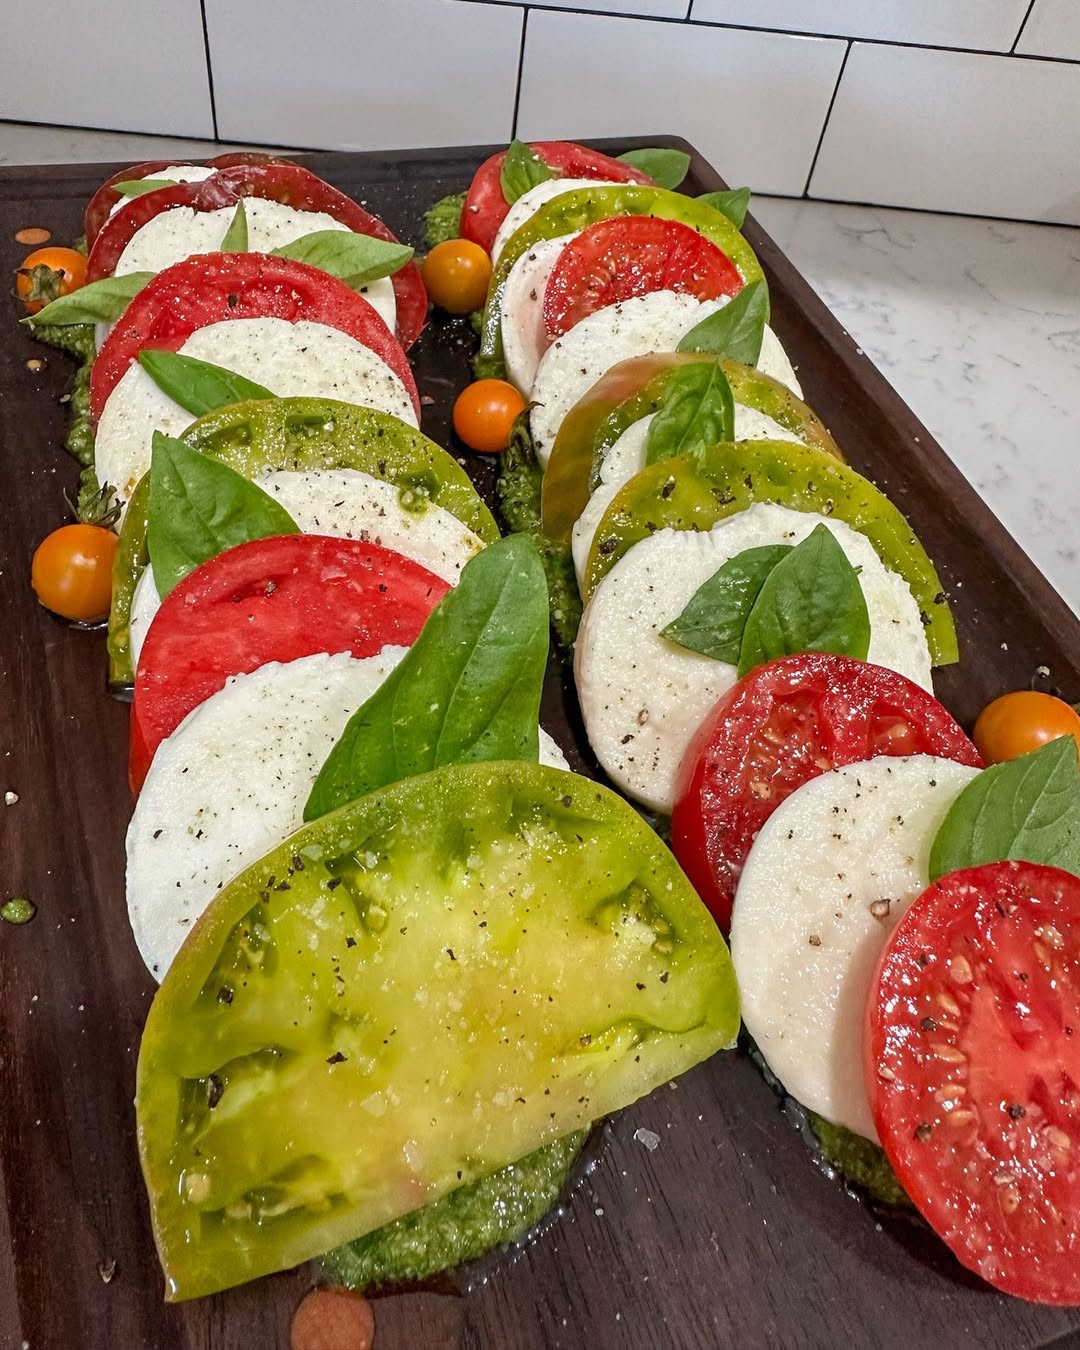
Best for: Day 1 or Day 2
Why I pack it: Balanced and hearty.
Ingredients
- 2 cups cooked farro or brown rice
- 2 cups cherry tomatoes
- 1 cup mozzarella balls
- Fresh basil, olive oil, balsamic, salt, pepper
At home
Layer grain, tomatoes, and cheese. Pack basil and dressing separately.
Pack & store
Keep cold. Add basil and dressing when ready to eat.
At camp
Shake, open, and enjoy. It’s simple but feels fresh.
Chickpea “Tuna” Salad
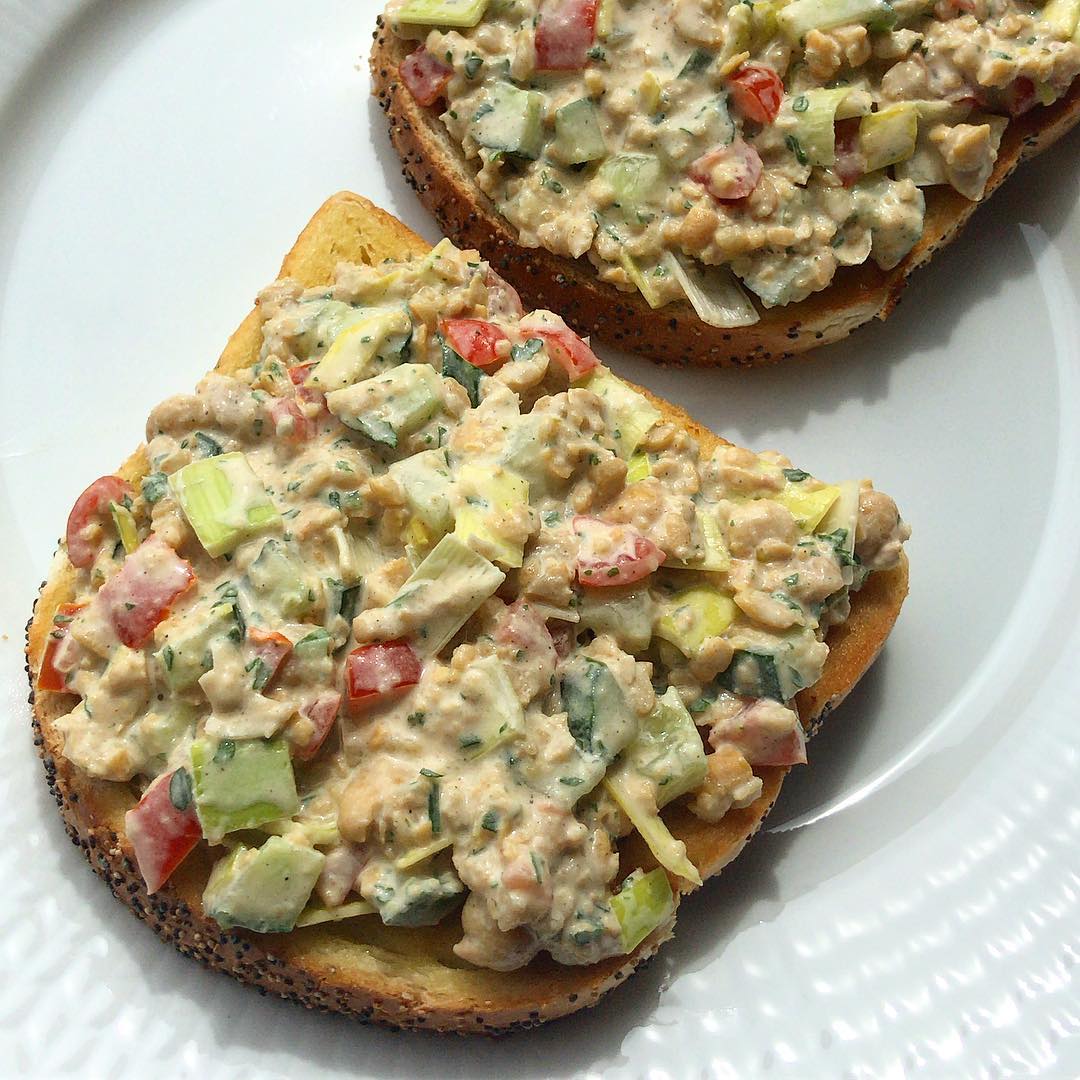
Best for: Day 2
Why I pack it: Plant protein that feels like comfort food.
Ingredients
- 2 cans chickpeas, rinsed and lightly mashed
- ½ cup diced celery
- ¼ cup minced red onion
- ¼ cup diced dill pickles
- ⅓ cup Greek yogurt or light mayo
- Lemon juice, salt, pepper
At home
Stir until creamy, season to taste.
Pack & store
Chill in a flat container.
At camp
Spoon into lettuce cups or spread on crackers.
Mediterranean Couscous Jars
Best for: Day 2
Why I pack it: Soft grains, bright veggies, salty bite.
Ingredients
- 3 cups cooked couscous, cooled
- 2 cups diced cucumber and tomato
- ½ cup crumbled feta
- ¼ cup olives
- 2 tablespoons olive oil, 1 tablespoon lemon juice
At home
Mix everything, season, and seal.
Pack & store
Keep chilled. Perfect texture on Day 2.
At camp
Eat straight from the jar, no plate needed.
Sesame Soba Salad
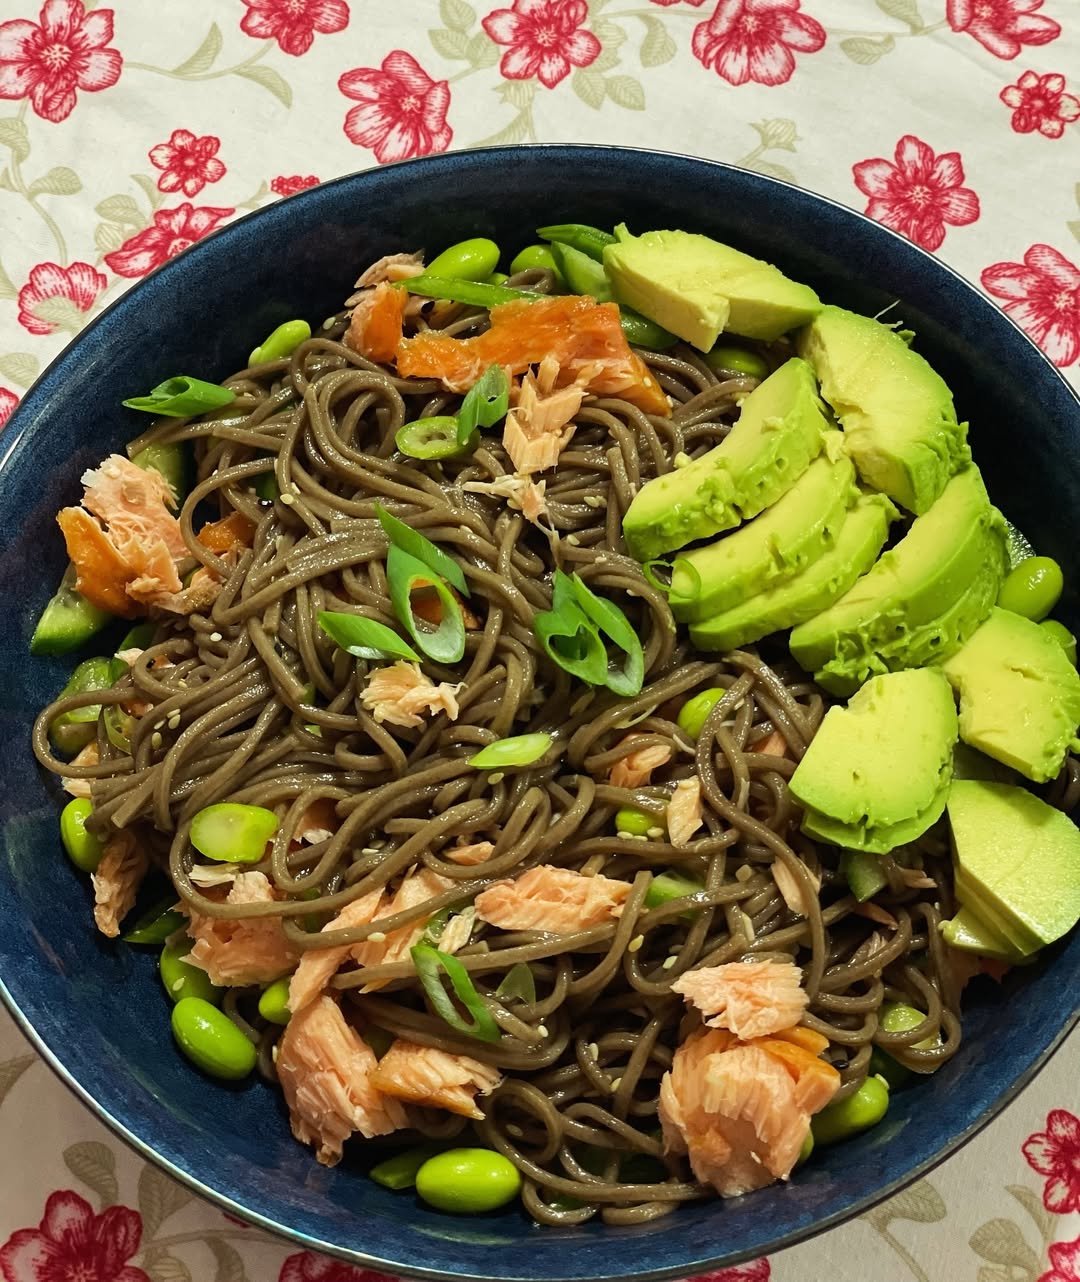
Best for: Day 2
Why I pack it: Cold noodles that actually taste good.
Ingredients
- 4 cups cooked soba, rinsed and cooled
- 2 cups shredded cabbage
- 1 cup grated carrot
- 1 cup edamame
- Dressing: 3 tablespoons soy sauce, 2 tablespoons rice vinegar, 1 tablespoon maple syrup, grated ginger and garlic, sesame seeds
At home
Toss soba with veggies and dressing.
Pack & store
Chill well.
At camp
Sprinkle extra sesame and eat cold. It’s light but filling.
Chia Pudding Cups
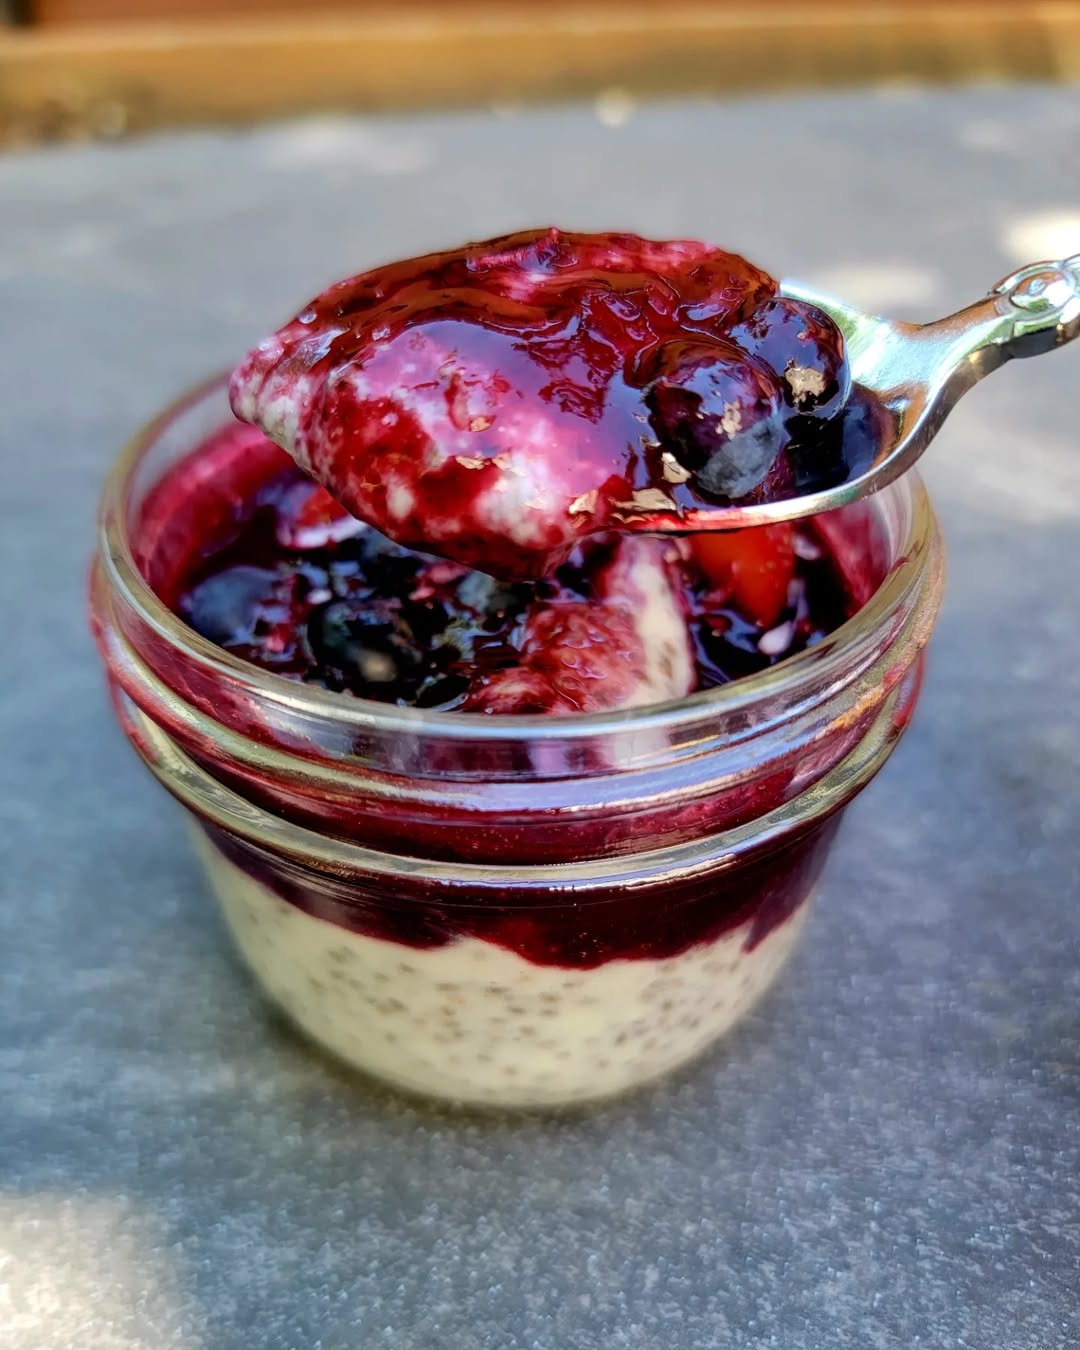
Best for: Day 2 or Day 3
Why I pack it: Dessert that doubles as breakfast.
Ingredients
- 1 cup milk or nondairy milk per jar
- 3 tablespoons chia seeds
- Dash of vanilla, drizzle of maple syrup
- Fruit and nuts for topping
At home
Shake seeds, milk, vanilla, and syrup in jars. Chill at least four hours.
Pack & store
Keep toppings separate.
At camp
Add fruit and nuts. It’s cool, sweet, and full of fiber.
Rice Paper Veggie Rolls with Peanut Dip
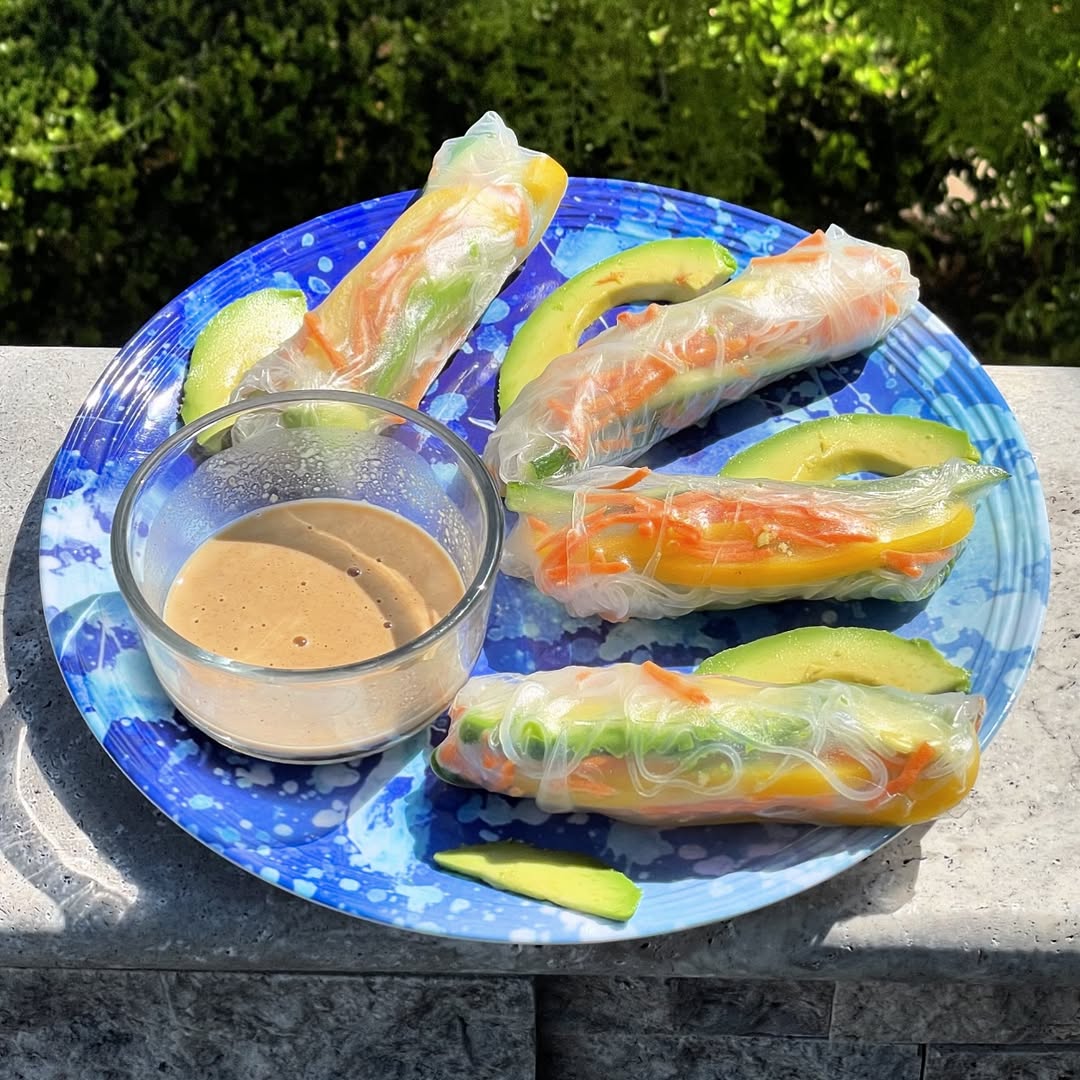
Best for: Day 1
Why I pack it: Crisp veggies that hold up in heat.
Ingredients
- Rice-paper rolls stuffed with lettuce, carrot, cucumber, and cooked shrimp or tofu
- Peanut dip in a sealed container
At home
Roll tightly, wrap each in a damp towel, then plastic. Pack dip separately.
Pack & store
Lay flat on top of ice.
At camp
Dip and bite. Every crunch feels earned.
Burrito Bowls in a Jar

Best for: Day 2 or Day 3
Why I pack it: Comfort food you can eat cold.
Ingredients
- 3 cups cooked brown rice
- 1 can black beans, rinsed
- 1 cup corn
- 1 cup salsa
- ½ cup shredded cheese
- Cilantro and lime
At home
Layer rice, beans, corn, salsa, and cheese. Keep lime wedges and cilantro separate.
Pack & store
Stay chilled. By Day 2, flavors have blended perfectly.
At camp
Add lime and cilantro, stir, and eat right from the jar.
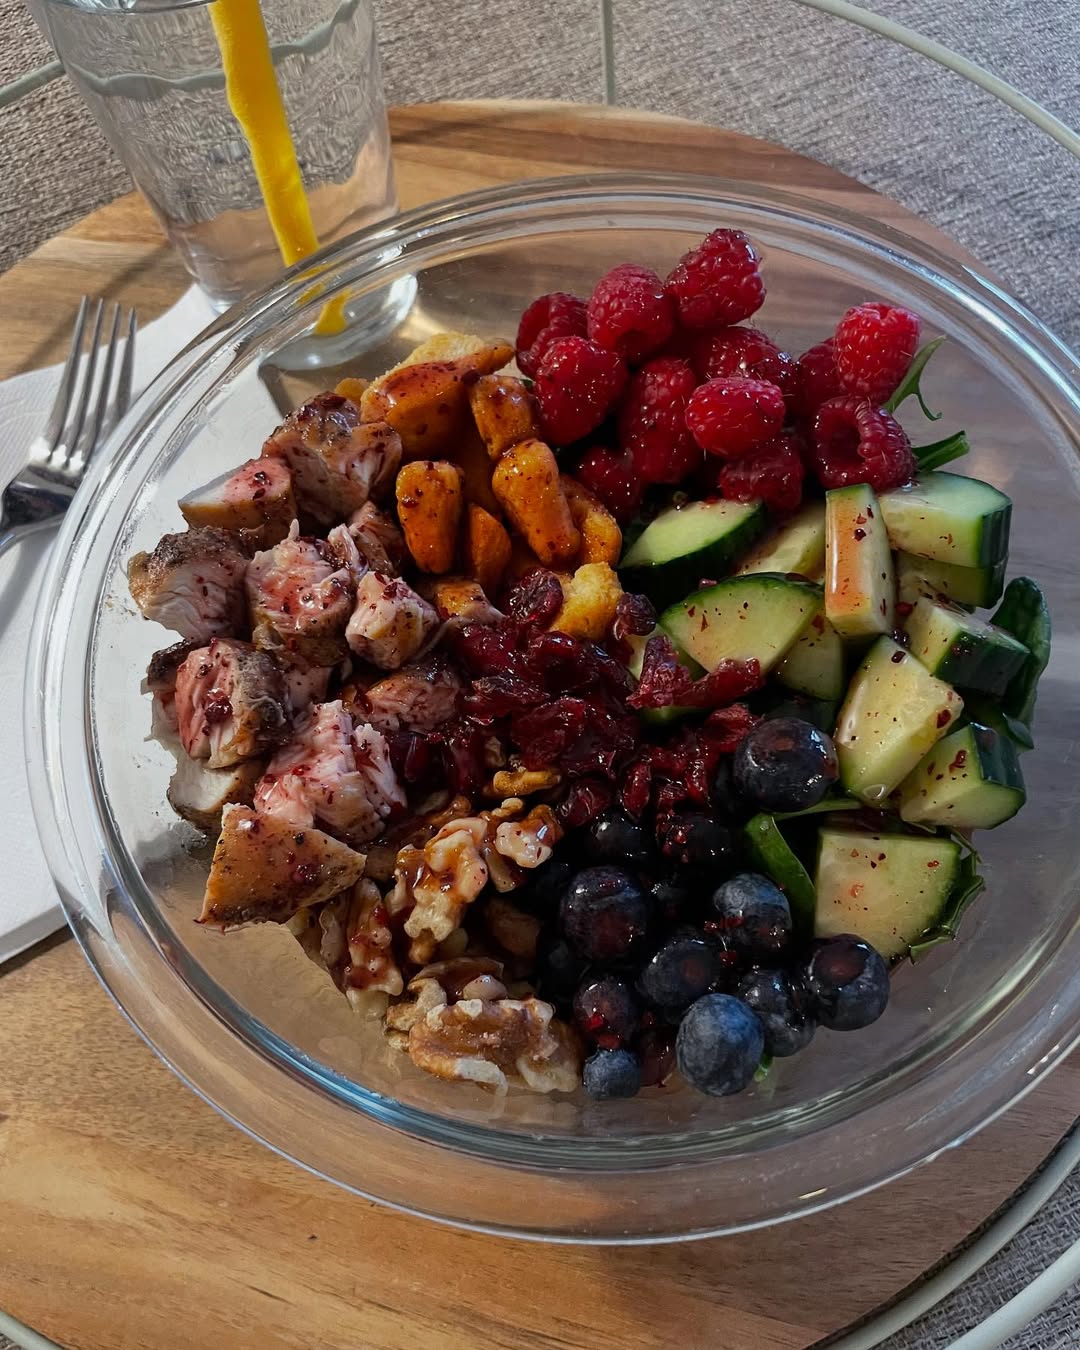
Protein Snack Box
Best for: Any day
Why I pack it: Small bites that keep energy steady.
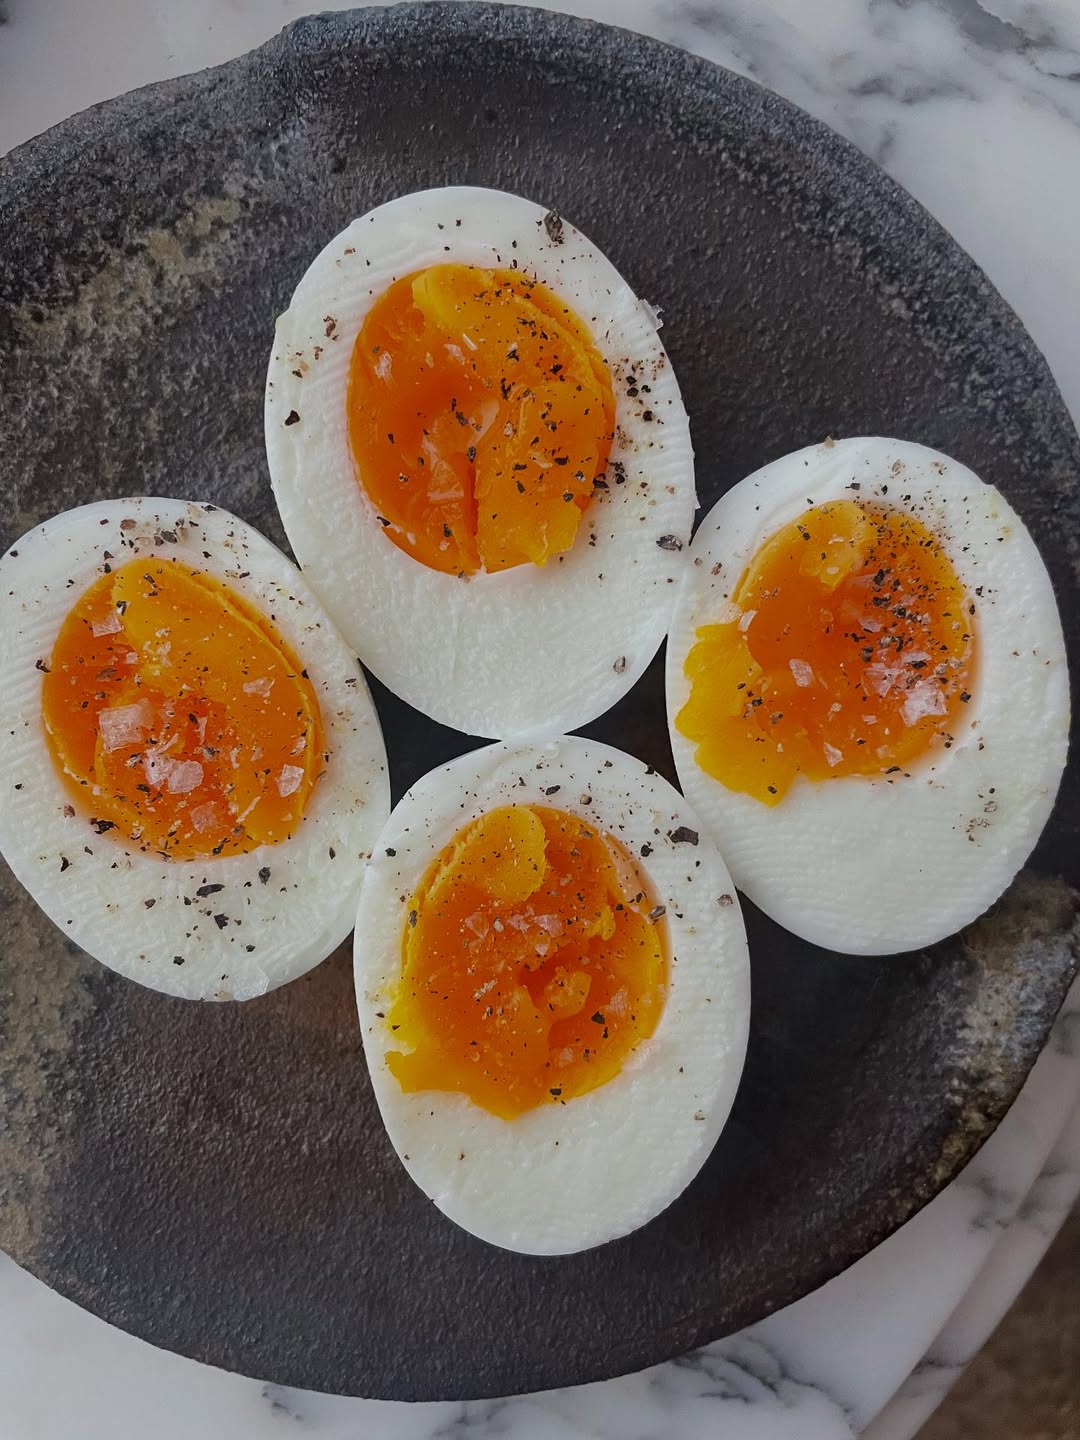
Ingredients
- Hard-boiled eggs
- Baby carrots and snap peas
- Turkey sticks or baked tofu
- Nuts and berries
At home
Build boxes by section. Slip a mini salt packet for the eggs.
Pack & store
Keep eggs at the coldest point.
At camp
Snack whenever hunger hits.
Apple Cheddar Whole-Wheat Sandwiches
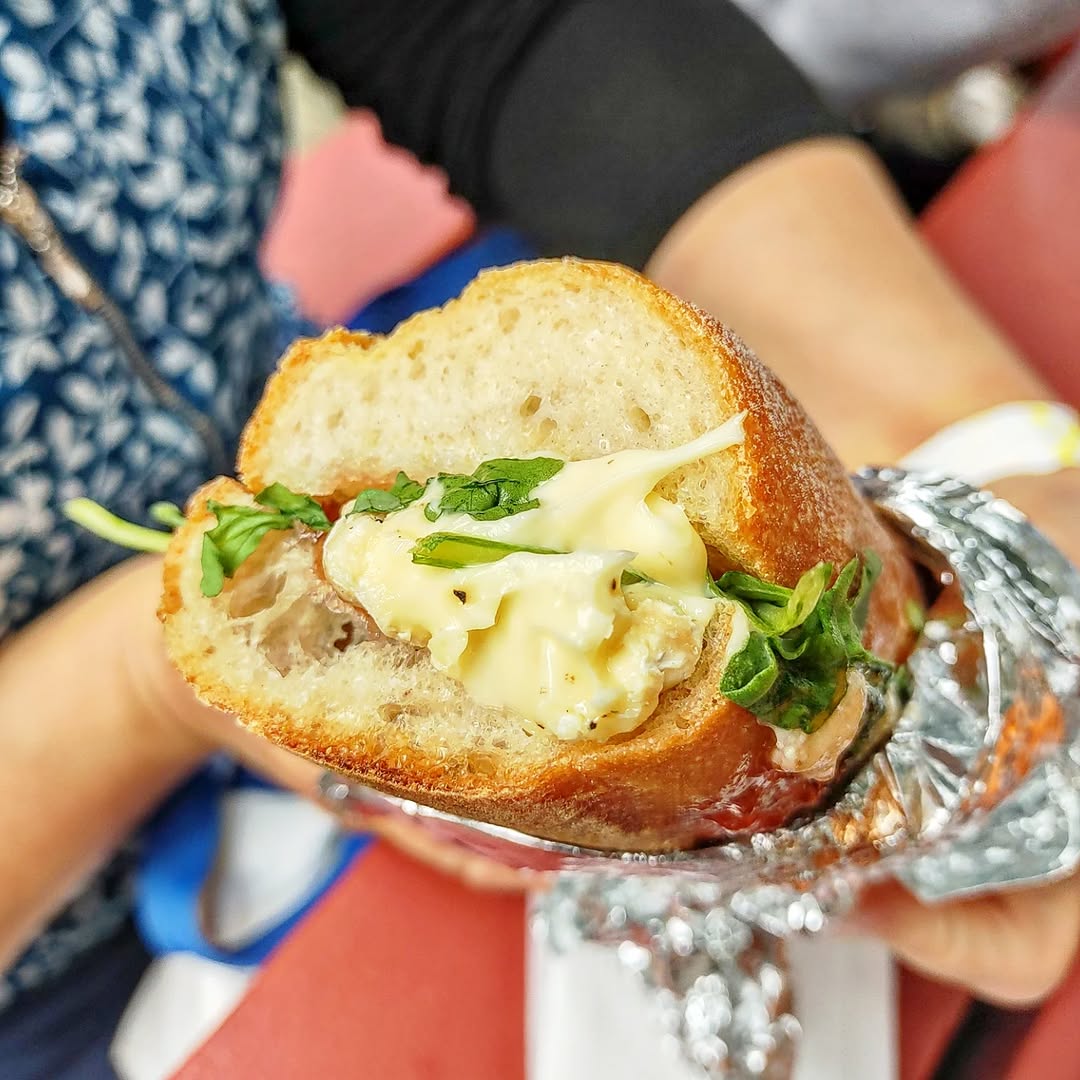
Best for: Day 1
Why I pack it: Crunchy, salty, and sweet all at once.
Ingredients
- 4 slices whole-wheat bread
- 4 slices sharp cheddar
- Thin apple slices
- Mustard or almond butter
At home
Spread mustard or almond butter, add cheese and apple, and wrap snugly.
Pack & store
Keep cool, don’t press flat.
At camp
Eat with a handful of nuts. It’s simple comfort food.
Yogurt Chicken Salad with Grapes
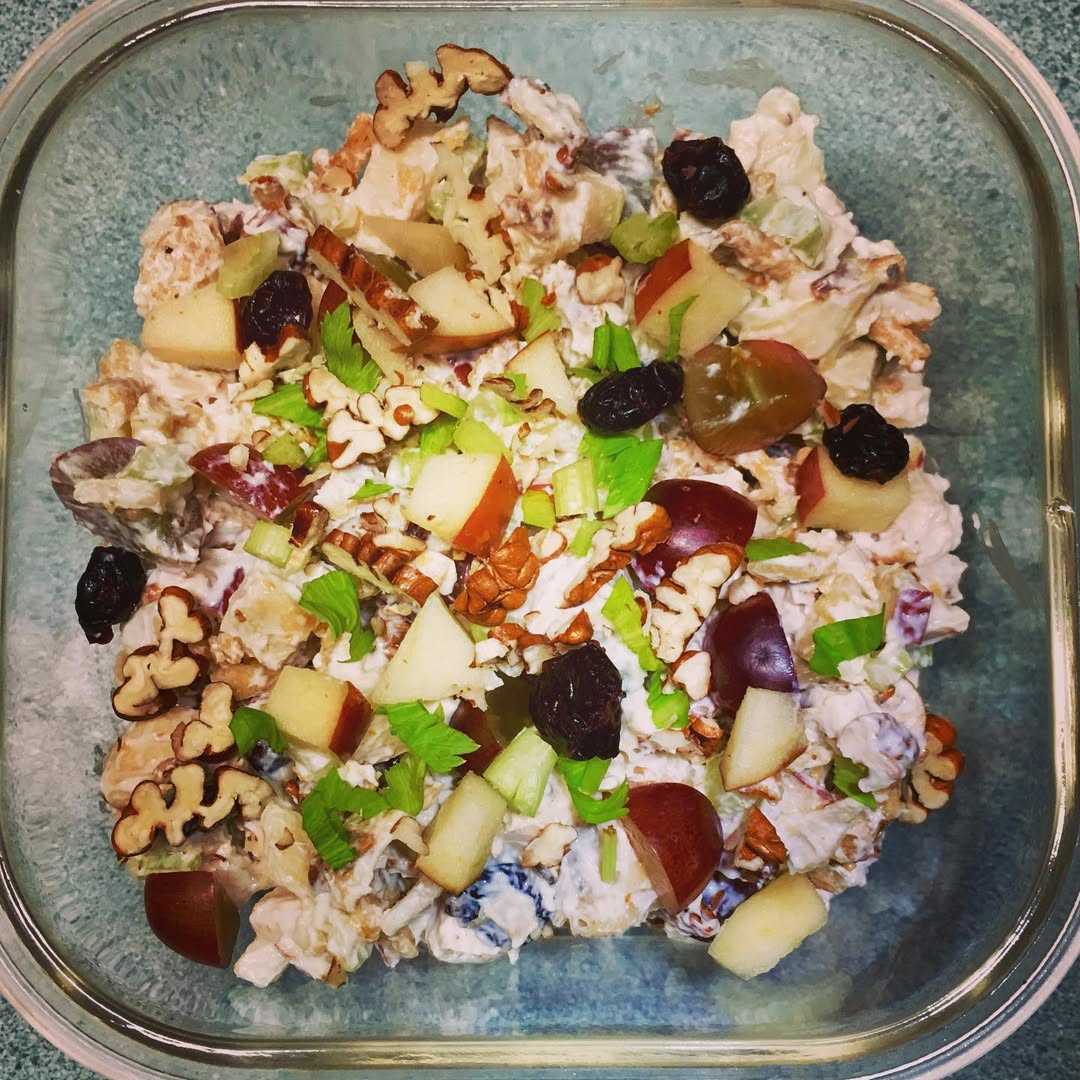
Best for: Day 1
Why I pack it: Classic flavor, lighter twist.
Ingredients
- 2 cups diced cooked chicken
- ½ cup Greek yogurt
- 1 cup halved grapes
- ½ cup diced celery
- Salt, pepper, squeeze of lemon
At home
Combine all ingredients and chill.
Pack & store
Keep in a deep container on ice.
At camp
Spoon into pitas or over greens.
Berry Spinach Mason Jar Salads
Best for: Day 1
Why I pack it: Fresh greens that don’t wilt.
Ingredients
- Bottom: olive oil and balsamic vinegar
- Middle: chickpeas and cucumbers
- Top: spinach, then berries and nuts
At home
Layer in that order and seal tight.
Pack & store
Keep jars upright.
At camp
Shake and eat right from the jar. It stays crisp, colorful, and refreshing.
These meals aren’t about perfect presentation — they’re about real food that travels well, keeps you full, and makes camp days feel easy. Every jar, wrap, and bowl adds a little comfort to the wild.
Fuel for Energy: How to Balance Nutrition Outdoors
When I plan camp meals, I keep it simple. Protein keeps me steady. Carbs keep me moving. Fats keep me warm when temps drop at night.
Here is why.
Protein = steady energy and repair.
Think lean chicken, tuna, Greek yogurt, eggs, tofu, or beans. Protein supports muscles and helps you feel full after long miles. Harvard Health describes protein, carbs, and fat as the macronutrients that supply energy and act as building blocks for the body. That’s the frame I use when I pack.
Carbs = endurance.
Carbohydrates give your body glucose for quick fuel during activity. I aim for slow-burn sources like oats, brown rice, quinoa, fruit, and starchy veggies instead of candy or plain white bread. The Nutrition Source explains that carbs are converted to energy for physical activity, and quality matters.
Fats = long burn and warmth.
A little olive oil, nuts, seeds, or salmon goes a long way. Fat delivers about 9 calories per gram, more than double protein or carbs, so it’s perfect for cold nights or big elevation days. The Merck Manual spells out that energy density.
Quick “eat this” guide
- Pre-hike breakfast: overnight oats with chia and fruit + a spoon of peanut butter (carbs + fat + a bit of protein).
- Midday: turkey wrap or lentil tabbouleh with olive oil (protein + carbs + fat).
- Late day or chilly evenings: quinoa bowl with beans and avocado, then a handful of nuts (balanced and warming).
“Not that” swaps
- Skip candy bursts that crash fast. Go for dried fruit mixed with nuts.
- Skip only-cheese-and-crackers. Add tuna or hummus so you’re not hungry an hour later.
- Skip heavy mayo salads in heat. Use yogurt or vinaigrettes that travel better in a cooler.
Read more: Quick and Easy Camping Meals That Make Outdoor Cooking Simple.
Frequently Asked Questions
How long can pre-made meals last while camping?
Most cooked foods stay safe for about three to four days when kept below 40°F in a cooler. Frozen meals or dishes with low moisture, like couscous or lentil salads, hold a little longer. If anything smells off or looks different, skip it. No trip is worth food poisoning.
What’s the best way to keep meals cold during a trip?
Use two coolers—one for drinks and snacks, and another for meals. Every time you open the lid, warm air sneaks in, which melts ice faster. Layer frozen meals on the bottom, pack pre-cooked foods in the middle, and fresh produce on top. Add frozen water bottles instead of bagged ice so you’ll have cold water later.
Can I freeze all my meals before leaving?
You can freeze most cooked dishes, but avoid greens, yogurt, or wraps since they can turn soggy. Freeze grain bowls, soups, or burrito fillings instead. When frozen meals start to thaw, eat them that day. That rotation keeps your cooler cold longer and gives you steady meal variety.
How much water should I drink each day outdoors?
The CDC’s heat-safety guide suggests sipping about one cup every 15–20 minutes during activity. For full days on the trail, that adds up fast, so pack more than you think you need. If you’re sweating a lot, swap in an electrolyte drink or add salty snacks. Clear or light-yellow urine is a good sign you’re hydrated.
Final Thoughts
Pre-made meals aren’t about skipping camp cooking—they’re about freeing up your time to actually enjoy where you are. When your meals are packed, labeled, and ready, the rhythm of camping slows down. Mornings start with food already waiting. Evenings end without dishes or cleanup.
And somewhere between that first bite of cold pasta salad and the last spoon of overnight oats, you realize something—good food makes every trip feel smoother, calmer, and more human.
So the next time you plan a weekend outdoors, prep a few of these meals ahead. Your cooler will stay cold, your body will stay fueled, and your camp mornings will feel easy.
Now I want to ask you – Do you prep your camp meals ahead of time, or cook everything on-site? Drop your favorite no-cook camping meal in the comments—I’d love to swap ideas with you.